I’m excited to announce a new knitting pattern release today which is available to purchase in PDF format.
This lacy top which I originally designed for Knitting Magazine has been revamped for 2020!
Unfortunately the yarn I originally designed the top in has since been discontinued and I love wearing this top in the summer months so decided to create another one in a yarn which can still be purchased which knits up to the same tension as the previous yarn and has the same yarn qualities and feel.
This is a beautiful soft and delicate lace top.
I love the fact that the top only requires 1 skein for the first three sizes and 2 skeins for the last 3 sizes which means it can be made in a luxurious yarn.
The top is knitted in the round up until the armhole shaping where it is divided for the back and front.
The only sewing required is on the shoulders.
The lace pattern finishes so beautifully around the armholes and neckline that the top doesn’t require any additional edge finishing.
The knitting pattern can now be purchased direct from my shop.
As a Knitwear Designer, one of the main things I love about my job is how I can create an idea in my head to a physical item.
My design process does vary for each knitting pattern I produce. Sometimes I can be inspired by a particular yarn, a photo, a stitch pattern I saw in a book or a need for a knitted item for my own personal wardrobe which I’m able to grade into various sizes and ultimately release it as a knitting pattern.
One thing I love the most in the early stages of the design is creating a design board where I place a sketch of the ideal finished item I would like to make, some yarn wrappings of what I’m going to knit with and finally, a knitted swatch of the actual design.
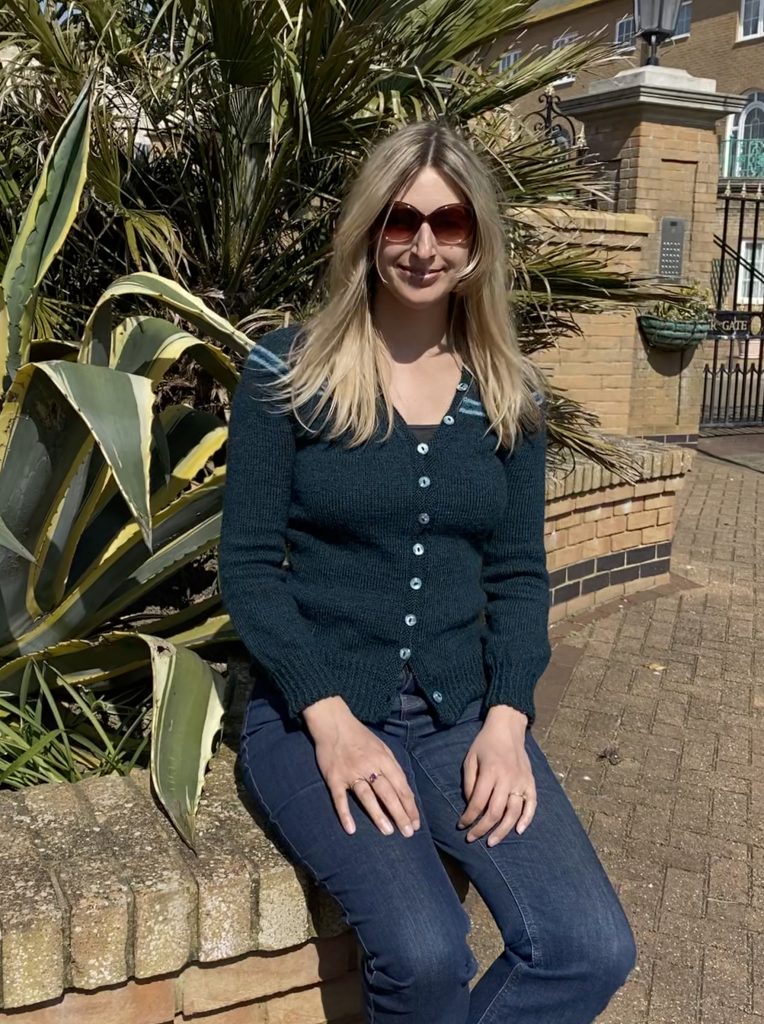
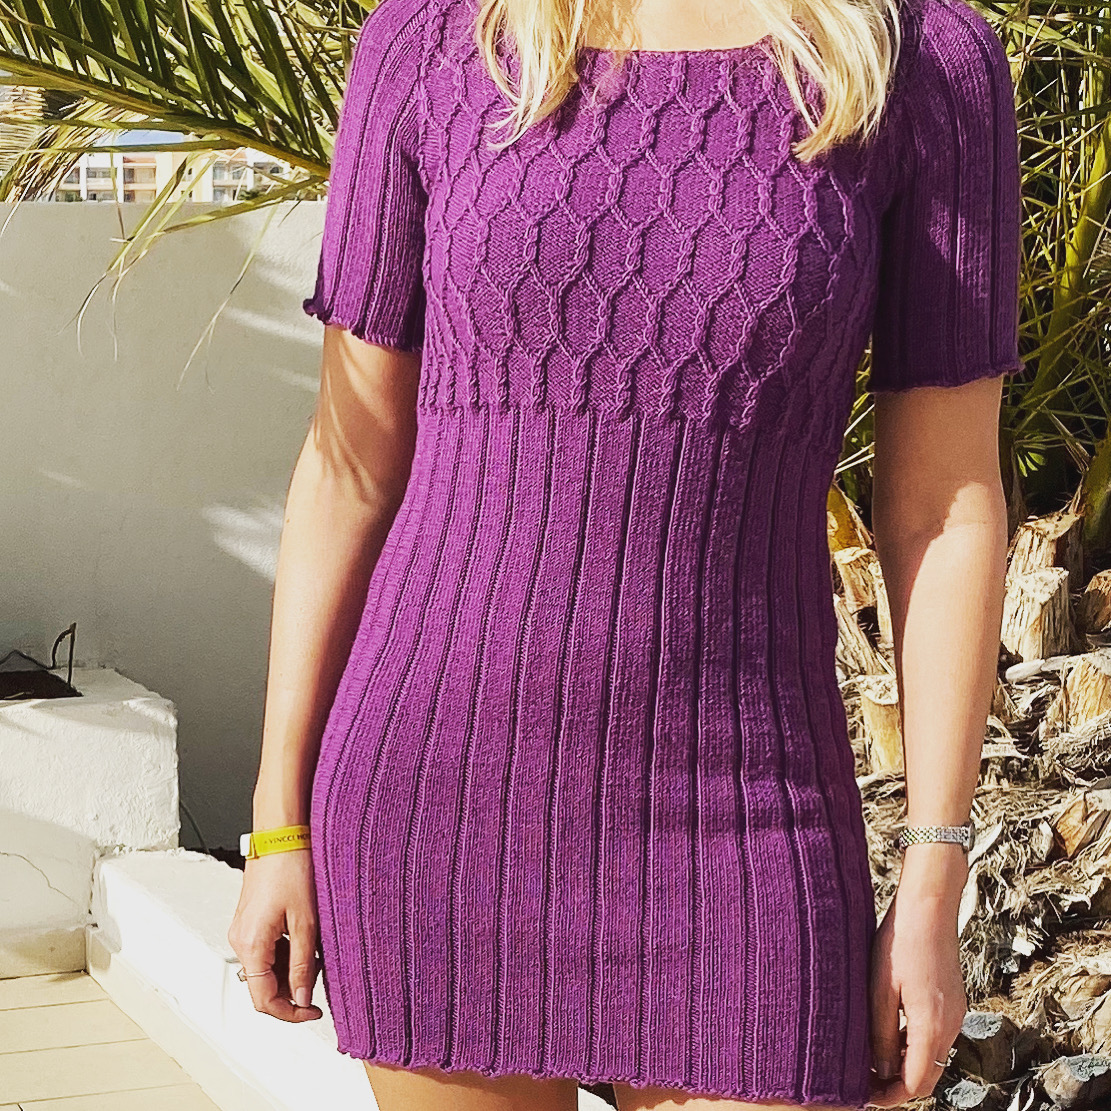
Today I wanted to focus on my inspiration for my Malachite Cardigan design. I think the clue is in the name of the pattern.
This pattern actually came about from initial inspiration from the yarn I had purchased from John Arbon Textiles.
They had recently released a new line of yarns called Yarnadelic, which were inspired by John Arbon’s record collection.
What is great about this yarn company (apart from the fact the yarns are produced in England) is that you’re able to purchase shade cards before buying any of the yarns. As a knitwear designer, this is great for me in helping to decide on a design and what colour palette I shall use.
I really fell in love with the shades of teal/blues in the colour range, especially the indigo dust.
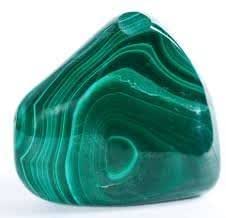
The particular shades of blue I wanted to use in my design reminded me of the Malachite crystal. I’m a big lover of crystals, how they look and their healing properties.
I then expanded on the crystal properties further. You’ll see from the following photo that Malachite has a series of different shades of lines running through it:
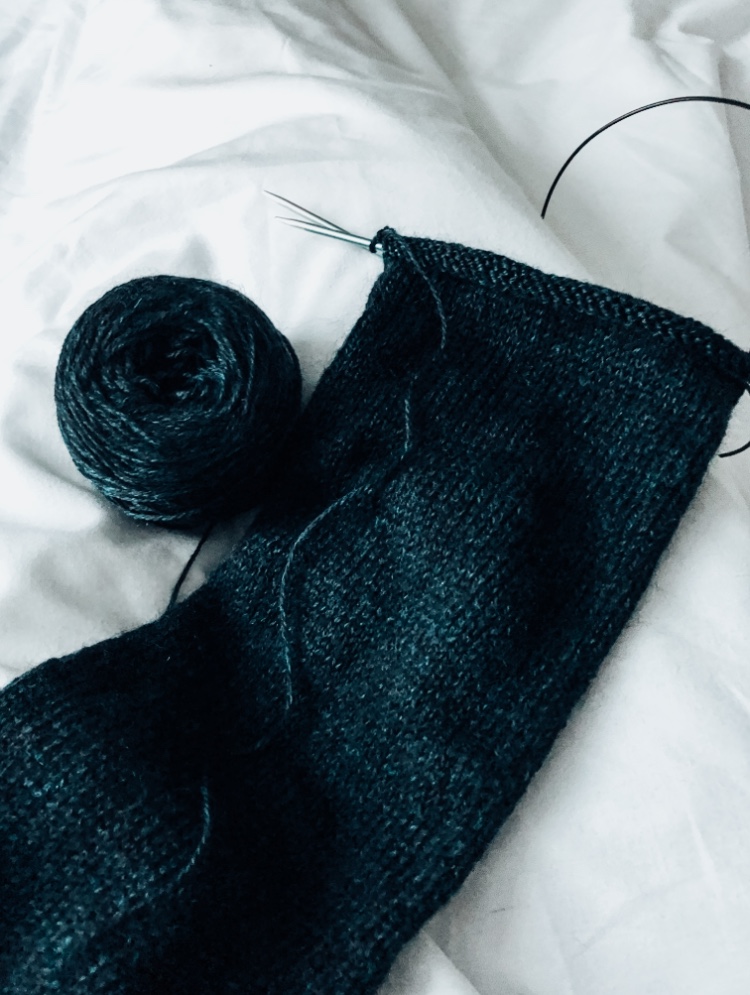
I also have to bear in mind the construction that I would like in my design and I knew that for my cardigan design, I wanted the main body to be in stocking stitch and the cuffs, hem and neckline to be ribbed as this yarn has a tendency to curl just with stocking stitch so the rib prevented this from happening.
Here is photo of me knitting a sleeve of the sample garment using the magic loop method for the circular knitting:
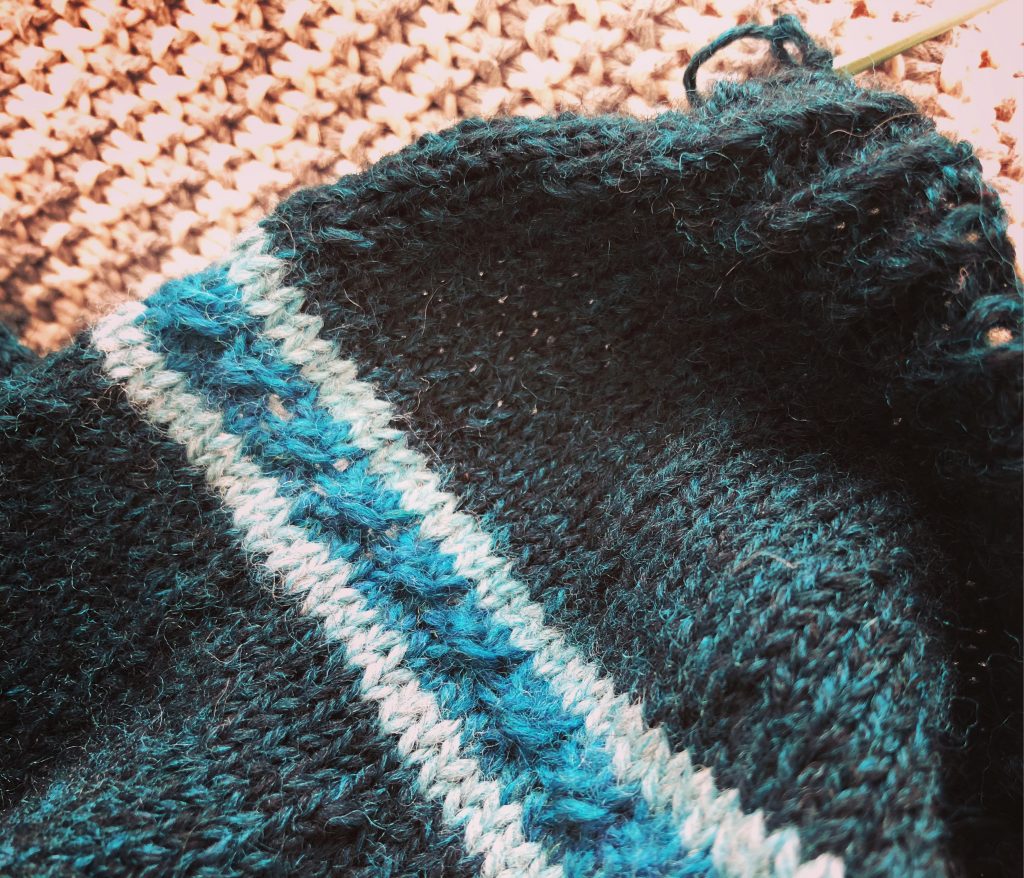
I knew I wanted to somehow feature the line inspiration from the crystal into my design and eventually settled on a line pattern with the different shades of blue around the yoke:
I really liked the pop of colour that the cardigan has with this feature.
When you’re a knitwear designer, it’s really important to try and get good photos of the knitted sample that you’ve written a knitting pattern for.
After all the hard work that goes into designing and writing the pattern, it would be such a shame if the photos let the pattern down.
Since I’ve been designing for several years, I’ve been able to review my pattern photos and assess what I’ve liked/not liked about them and where I could improve.
I find this is an ongoing process, and I can still produce photos I’m not entirely happy with, but l always hope that I can learn how to improve on taking the photos in the future with practice.
For me, one of the key things to a successful knitting pattern photo is location.
There are also other things that need to be taken into account, such as finding the right model for the item (if a garment or knitwear accessory) and also weather conditions and lighting.
As much as I wouldn’t want to have the photos taken on a rainy day, I also learnt over the years that a bright sunny day isn’t always great either so it’s getting a balance to get the best possible photo you can.
I’ve always tended to model for the photos of my knitting patterns. This was mainly because the sample garment for the patterns are normally in my size, plus I save on the cost of hiring a model for the day so it just made sense for me to do it that way.
Whilst in an ideal world you could dream of having your perfect model, a picture perfect location and an amazing, top of the range digital camera with a professional photographer, the reality is that all of this would potentially cost a small fortune before you’ve even started listing the patterns for sale.
When you’re a small business, such as mine, you need to be realistic about costs of a photo shoot and ideally try and save money where you can, since you don’t know whether the pattern you’ve designed will be popular or not.
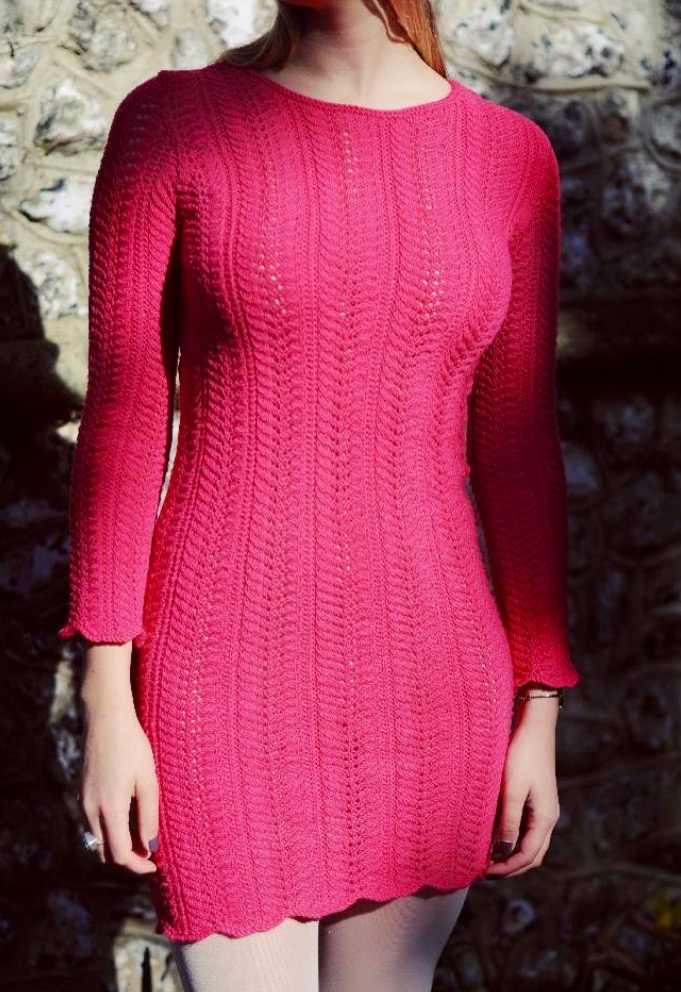
Over the years, I’ve experimented with trying different locations and once, I even hired a professional photographer, like on this particular photo shoot for my Stem Leaf Lacey Dress pattern:
Stem Leaf Lacey Dress
Whilst I was impressed with the results of the photo shoot, I found that I didn’t sell anymore patterns than others where I hadn’t used a professional photographer.
This was an important lesson for me to learn where my business is right now. It isn’t necessarily important about the type of camera or photographer I need to use for the photo shoot.
I am quite fortunate to live near Brighton Beach, so I have a great location for taking a lot of my pattern photos. However, I do worry about my photos becoming boring if all of my photos were taken at this location (especially as the same model is normally used which is myself) and sometimes, the particular item I’ve designed doesn’t always suit the beach location.
I therefore have had to get creative over the years to find other locations to take photos of my knitwear.
For most photo shoots I tend to only need five things for the photos:
The knitted sample (that the knitting pattern is for)
Me (since I normally model most of the items)
A digital camera (or phone with a built in camera)
Somebody to take the photos
The right weather conditions
With regard to the camera, I did have a digital point and shoot camera, but in recent years, the camera phones have become so good, they tend to be all I need for my particular photos.
I normally get my husband to take the photos, using his latest iPhone camera.
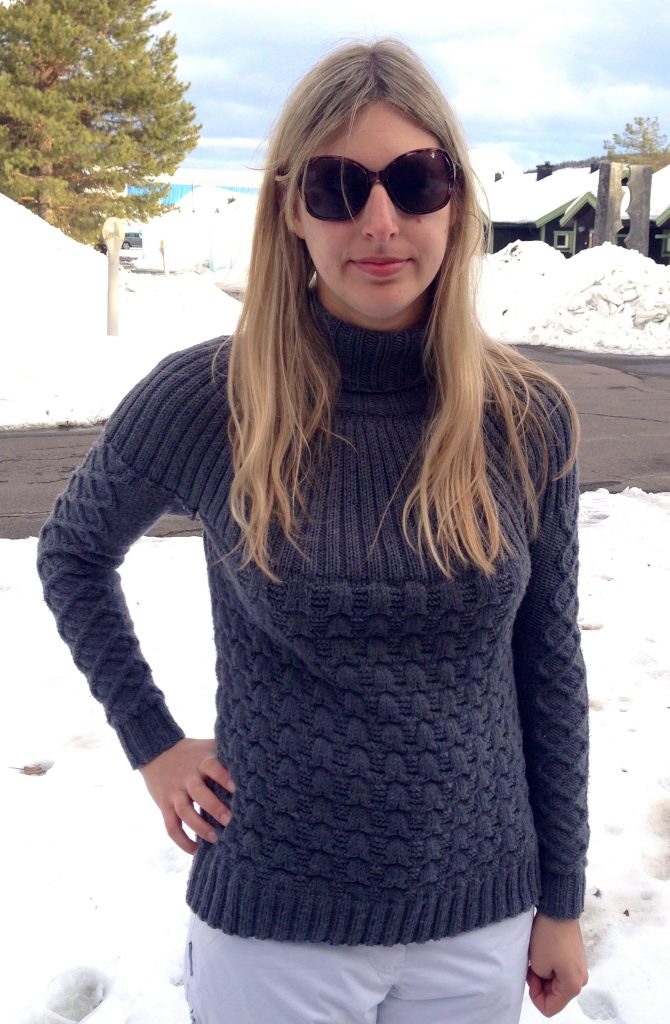
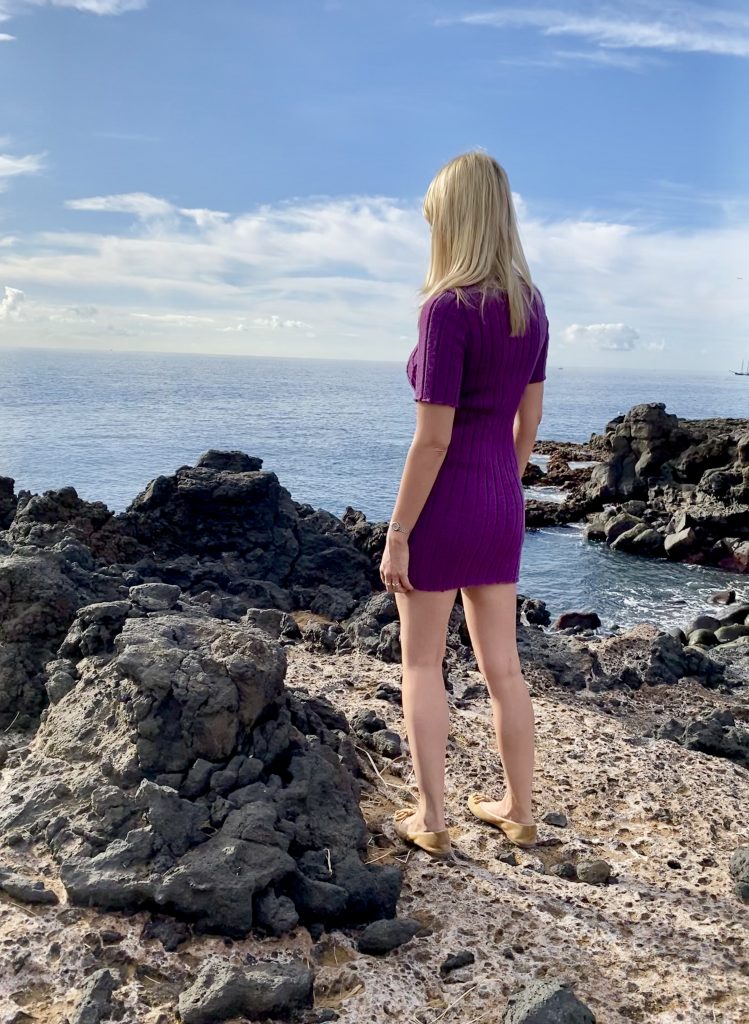
Some good locations over the years that I’ve found for taking photos is when I’m abroad on holiday. A few years ago, I visited an Ice Hotel in North Sweden which provided an amazing back drop for taking photos of the sample garment for my Textured Yoke Top knitting pattern:
Textured Yoke Top
This photo was taken by my husband using the camera on his mobile phone.
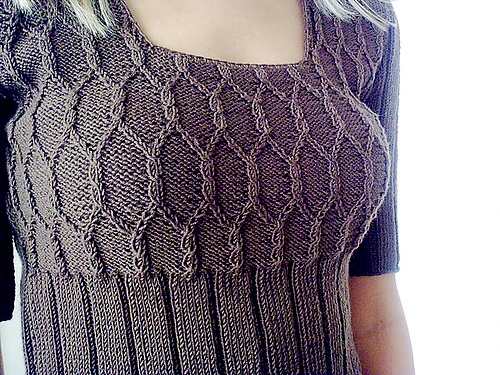
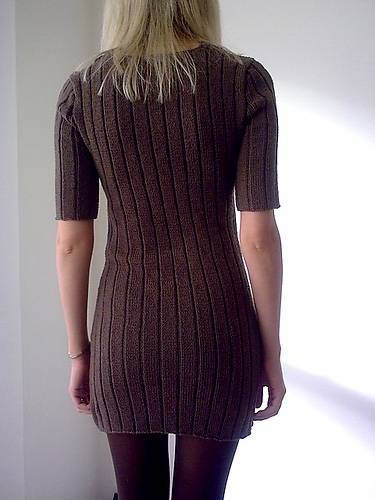
In Autumn last year, I had re-knitted a sample garment for my Cable Dress knitting pattern since this is a pattern that has always proved quite popular. The yarn I originally designed it in was unfortunately discontinued. I had also loved the original sample garment so much that I wore it until it practically fell apart so wanted to knit another one to be able to wear. I therefore knew it would be a perfect time to re-knit and re-write the pattern with a current yarn that is still for sale.
Also, I was really keen on re-doing the photos since the original photos were taken a few years ago when I was new to knitwear designing and pretty clueless about how to take photos. I think what made the pattern really popular was that my husband had taken a photo of a close up of the cable pattern detail on the front chest area which was quite striking:
Cable Dress Version 1
However, I didn’t feel the rest of the photos taken were particularly great like these ones, as we had just taken them against a white wall in my living room:
Cable Dress Version 1
I knew for the updated pattern, that I wanted the photos to be taken outdoors on a fairly sunny day.
This brings me to the next important lesson I’ve learnt on taken pattern photos which is PATIENCE.
When I’ve knitted a sample garment, I’m always really excited by the finished product and am keen to get the photos taken and the pattern listed asap!
However, in the past when I’ve rushed this process, I’ve ended up with poor photos that I’ve either had to discard and retake them or had to accept them for what they are and edit them the best I can.
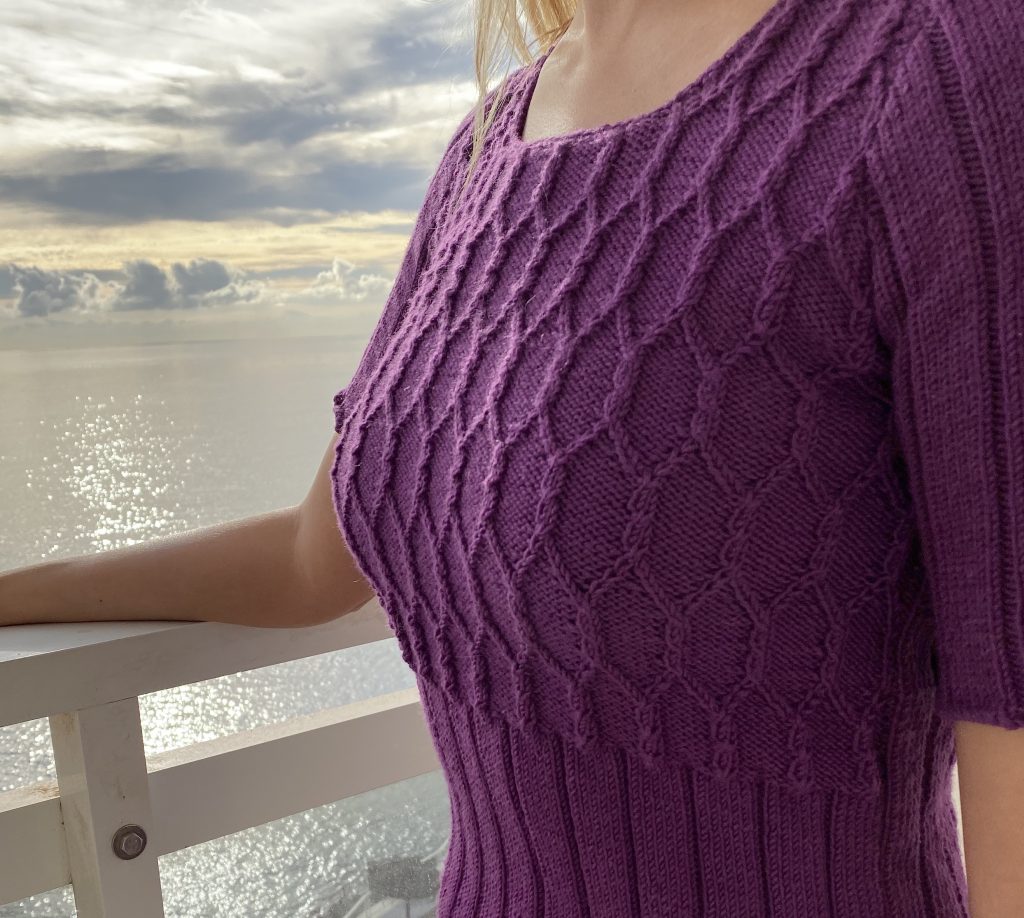
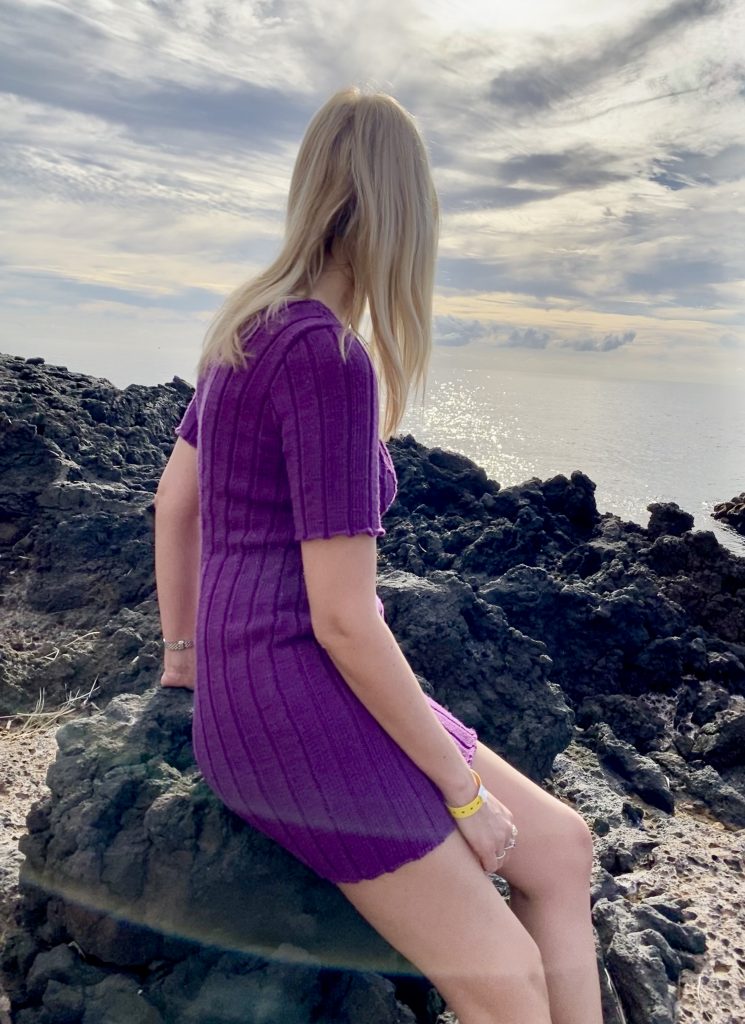
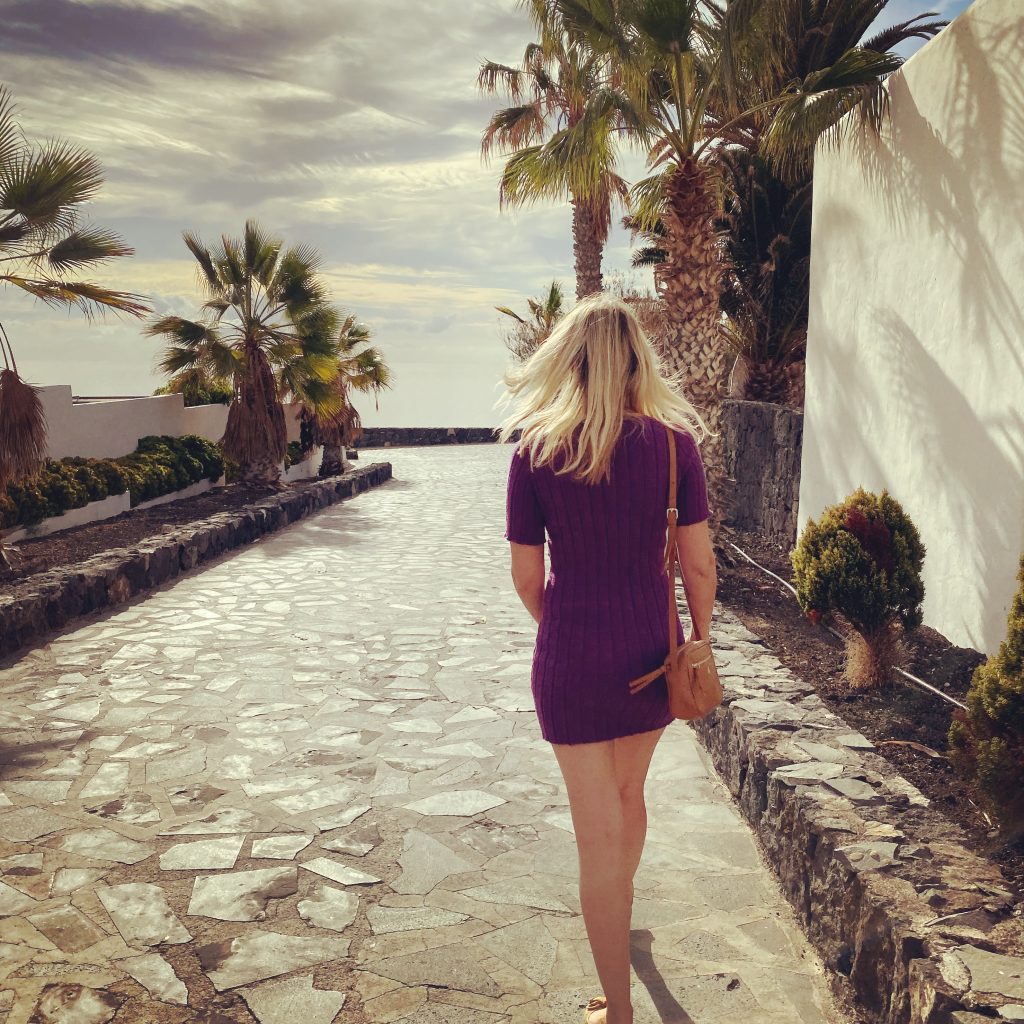
Once I had finished the Cable Dress sample garment in Autumn, I had to be ‘patient’ and carefully plan where I was going to have the photos taken for this truly amazing dress. I wanted to do it justice!
I knew in December, I would be flying somewhere warm for some winter sun just before Christmas so decided this may be the perfect opportunity to take photos of the dress.
I also think it’s better for my husband (who takes the majority of the photos) as he is more relaxed on holiday and not frantically rushing around his really busy job to take time out to take photos for me.
We went away to Tenerife for a week and it was a really nice temperature at that time of year for wearing a knitted dress as it wasn’t too hot.
Here are some of the photos taken in Tenerife:
Cable Dress Version 2
I was really happy with these photos and was thankful that I had waited for the right location rather than just rush about taking the photos anywhere since I don’t think they would have turned out as nice.
I liked the rockery area in Tenerife where we took a majority of the photos. There was some cloud in the sky so the photos weren’t too bright. This means I got the knitted detail I wanted to show in the dress.
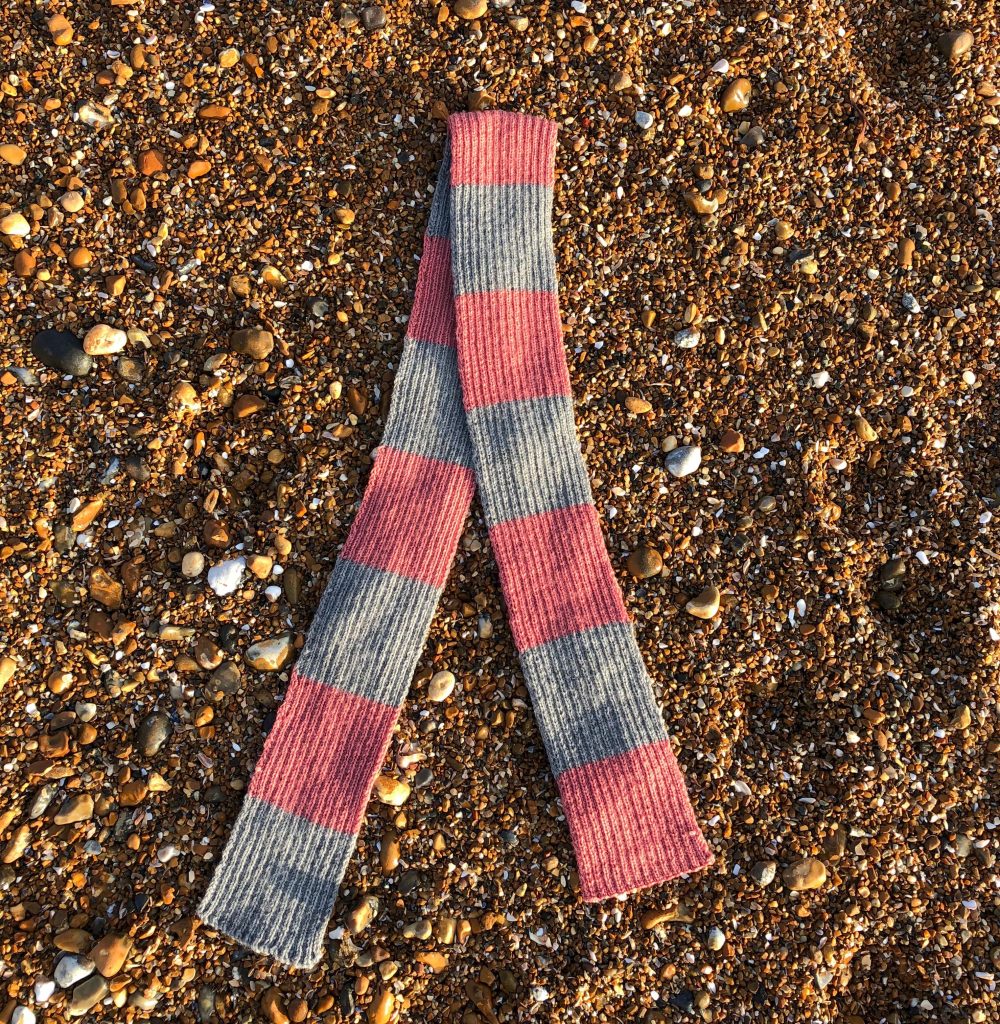
Recently, I decided to take some photos myself of a free knitting pattern I listed called the Ribbed Scarf.
Since it was a knitted accessory, this was an easier photo to take by myself rather than a garment I would have had to model.
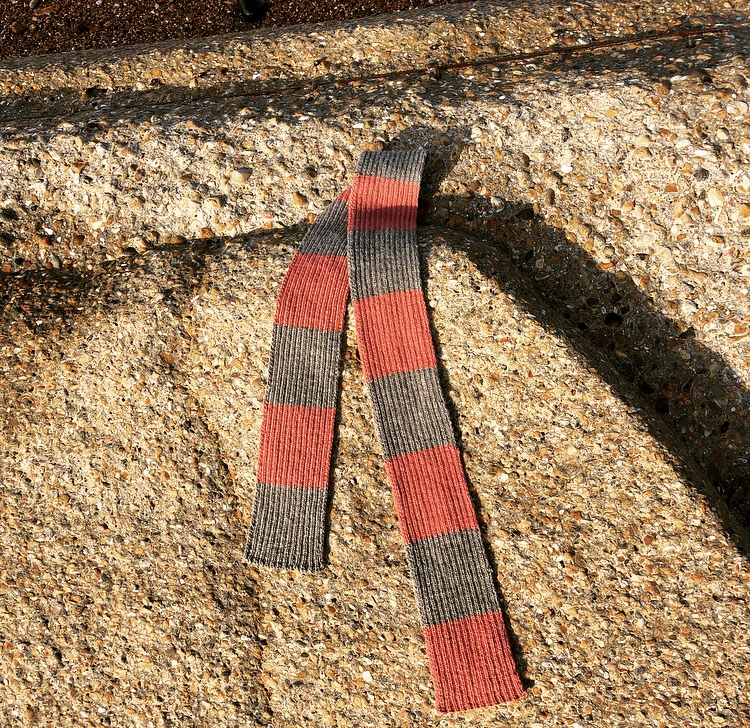
I initially took a photo of the scarf which I laid out nicely on the beach where I live:
Ribbed Scarf
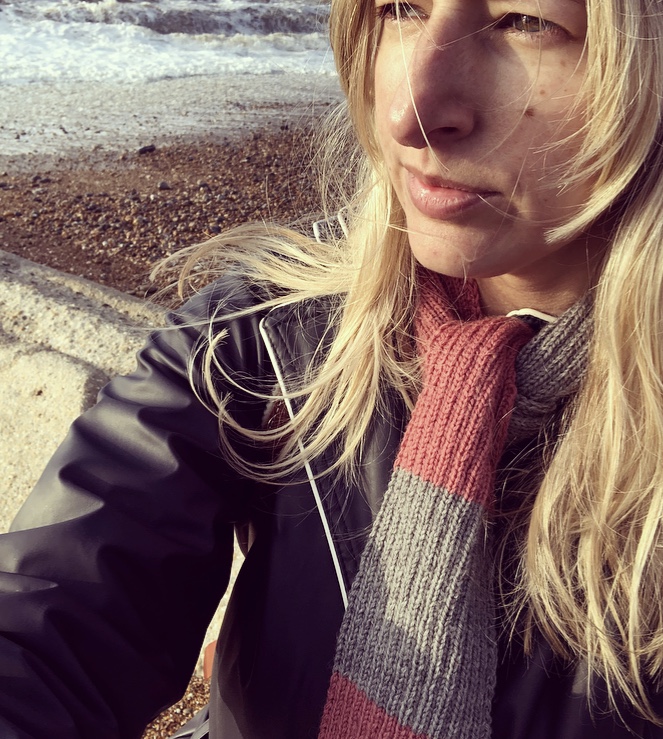
I don’t normally do ‘selfies’ but I decided to do one for this scarf pattern:
Ribbed Scarf
I thought these photos were good enough for the pattern so used them.
I’m currently working on some new designs that I’ll be releasing this year which is very exciting!
When I purchase yarn for a new design I’m working on, I always tend to buy a couple of balls more than what I need for the actual sample garment.
There are several reasons for this. Sometimes it’s because I require the additional yarn to swatch the stitch patterns I want to use in the design. Another reason is that I may decide midway through the design that I want to change it slightly, such as making the sleeves longer which will require more yarn.
Another reason is making sure I have enough yarn in the same dye lot in case I find I run out near the end of making the sample pattern, where I may not be able to obtain the same dye lot again and I therefore risk a variation of colour in the finished garment.
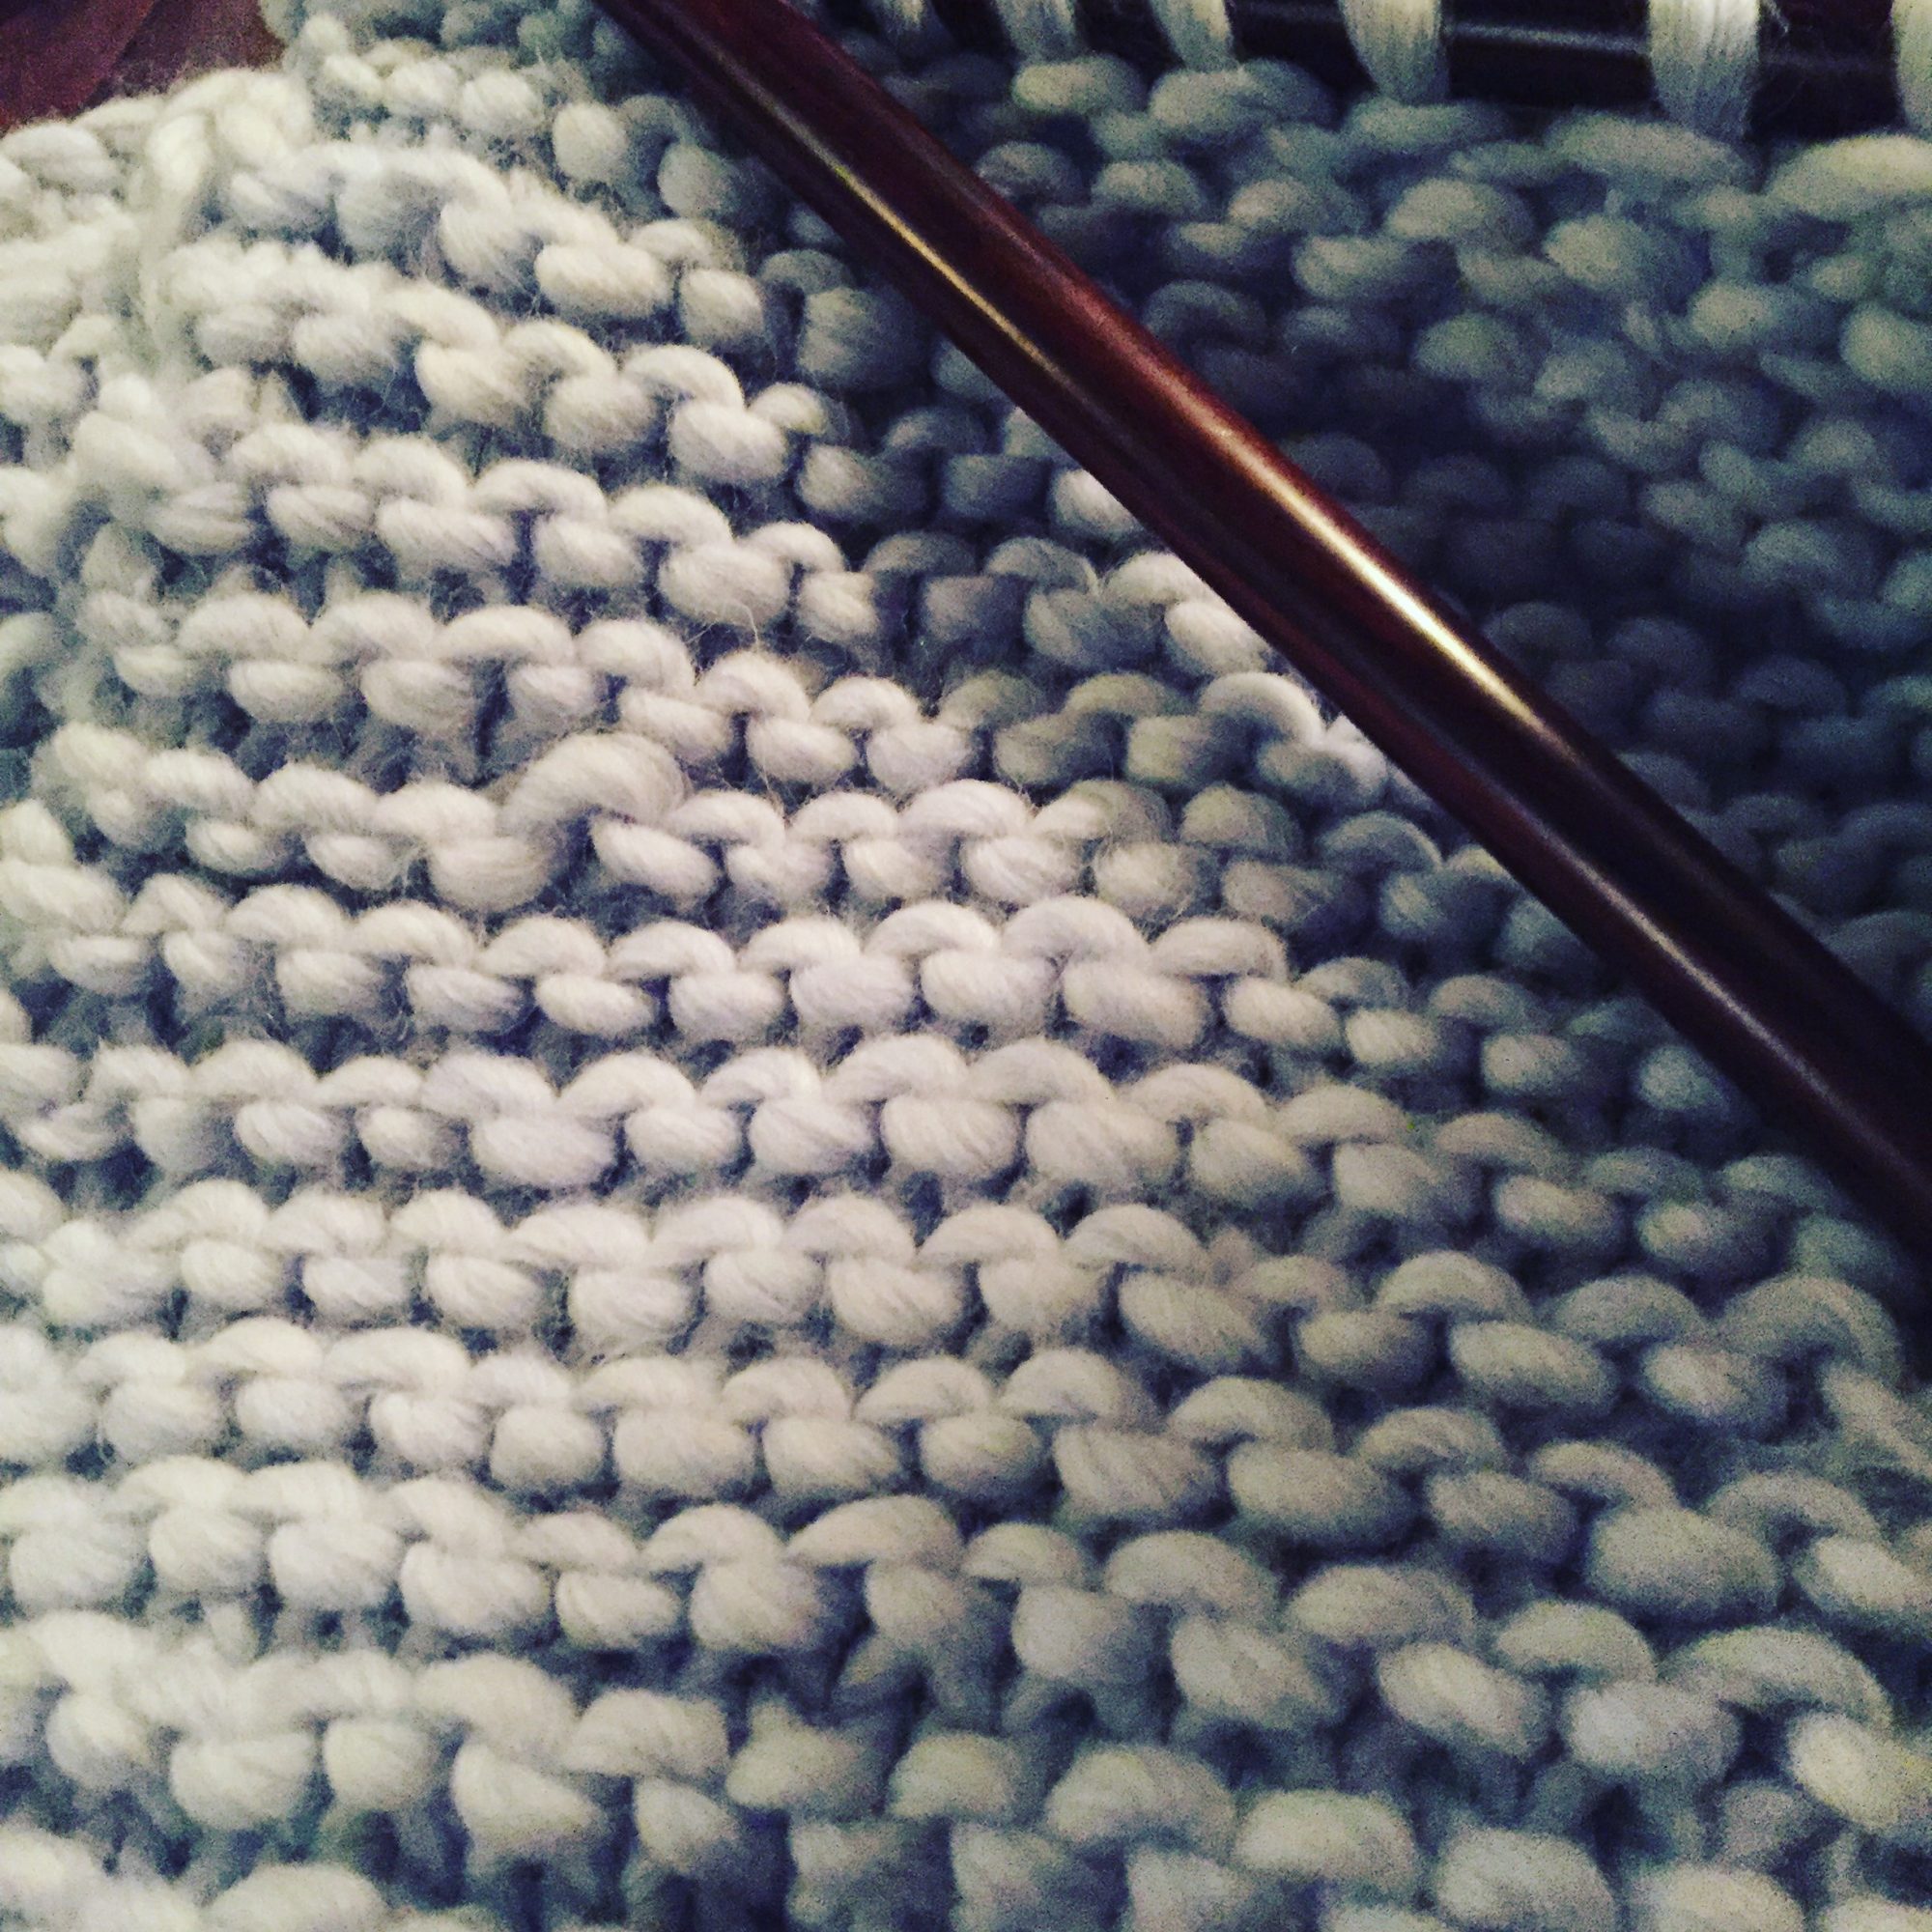
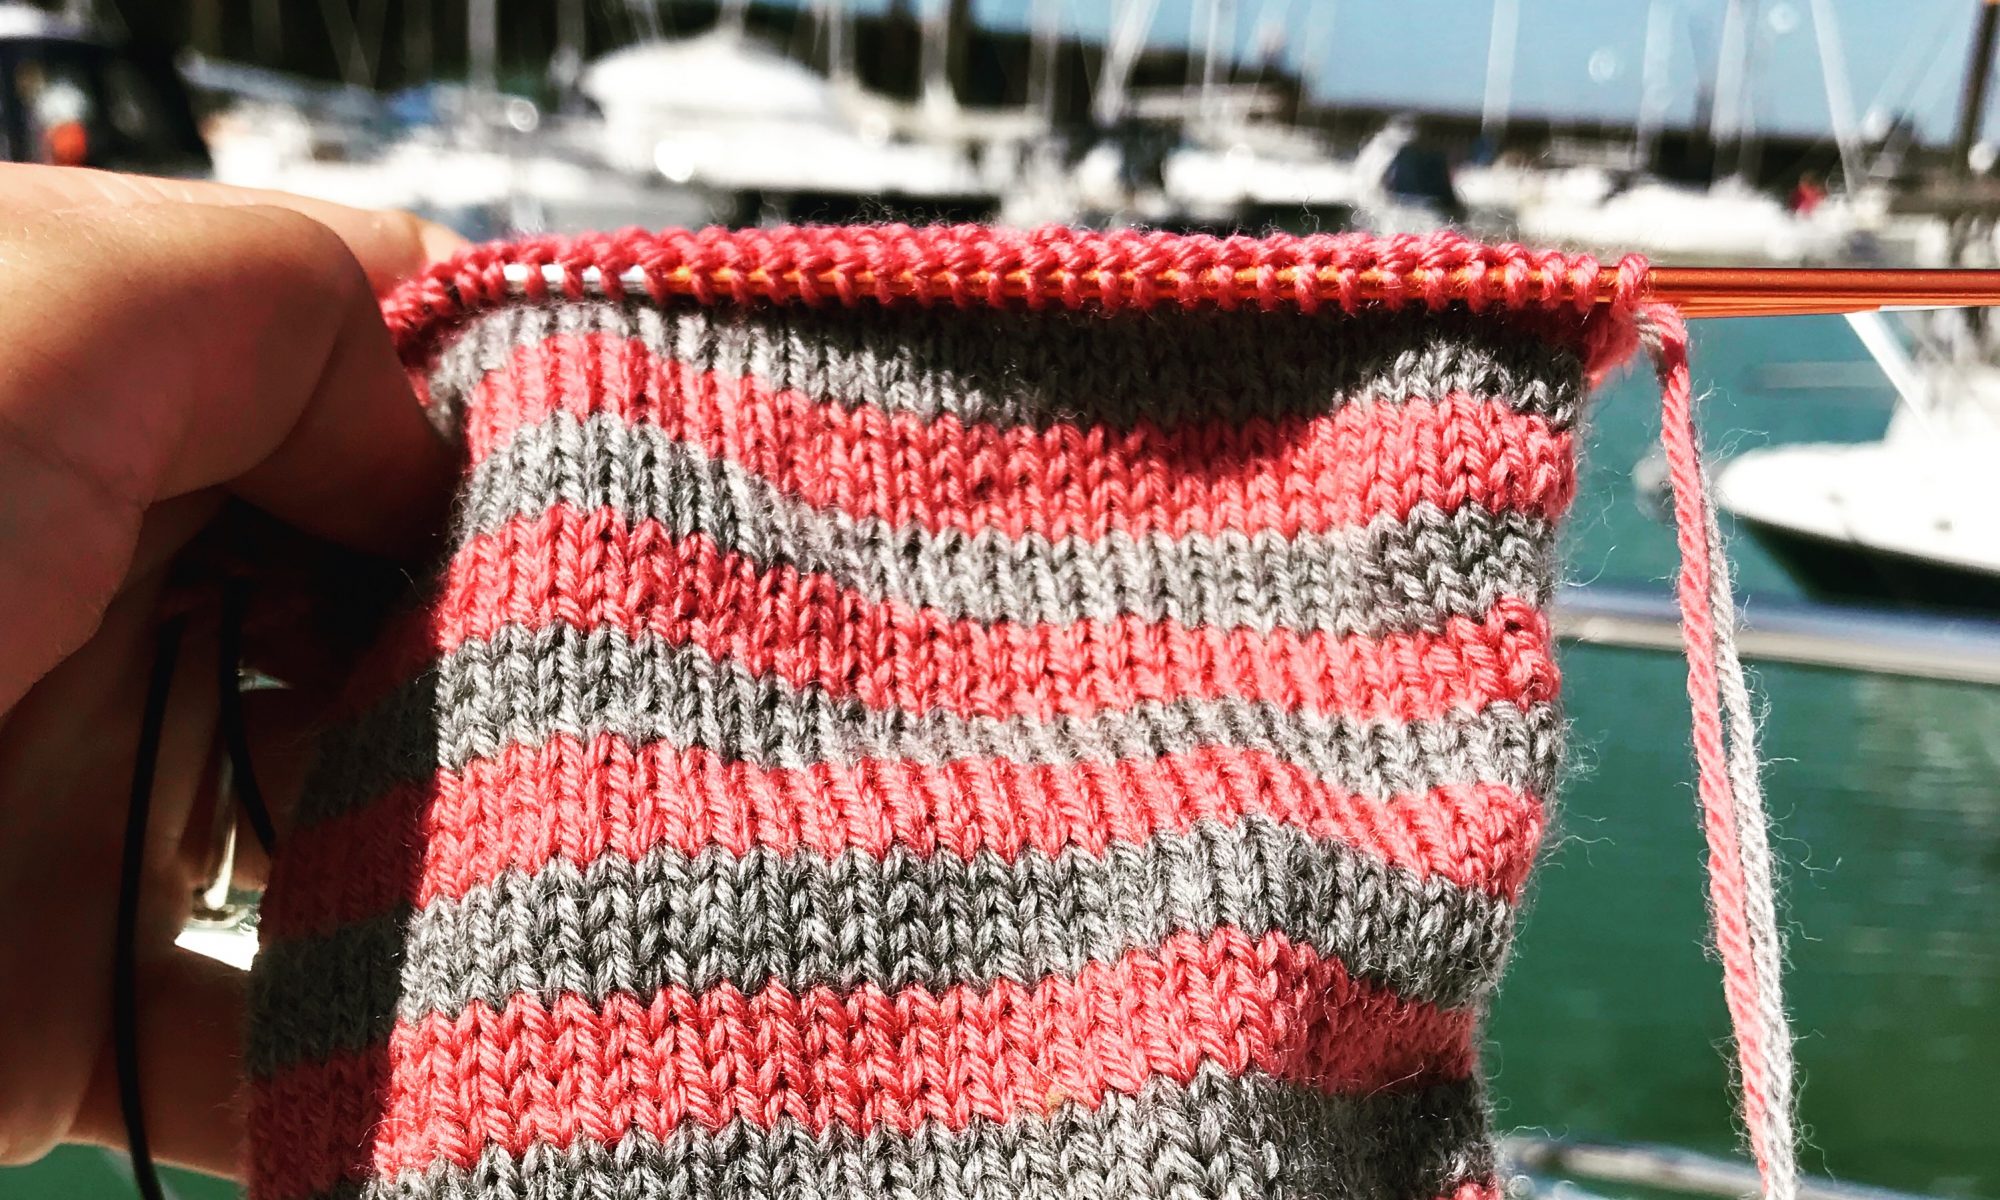
I was recently working on a sweater design and on completion of the sample garment, I had 2 x 50g balls left over in two colours (the sweater was a coloured striped pattern). Part of the garment being knitted, is featured in the cover photo of this blog post.
This yarn by CaMaRose is so soft and scrumptious that I didn’t want to see those left over balls of merino yarn go to waste.
I therefore got creative and worked out that there was enough in the meterage of these left over balls to knit a scarf.
I absolutely love wearing scarfs throughout the winter and sometimes I also make them for other people as gifts.
I decided to keep this scarf for myself as I really love the colours which will go with a lot of my clothes and it is so soft against my skin.
I decided to do a rib design and created wide coloured stripes instead of the thinner stripes that I had created in the original sweater this yarn had been used for.
Here is the finished scarf:
I made this scarf design into a free pattern which can be downloaded on the ‘Free Patterns’ section of my website so check it out.