During a recent local walk, I came across a lot of pine cones on the floor that had fallen from a big tree. I decided to pick up several of them and experiment dyeing with them at home.
I had read that tree bark and cones are rich in tannins which means the dyed item should hopefully be more colourfast so I thought these cones would be great to dye with.
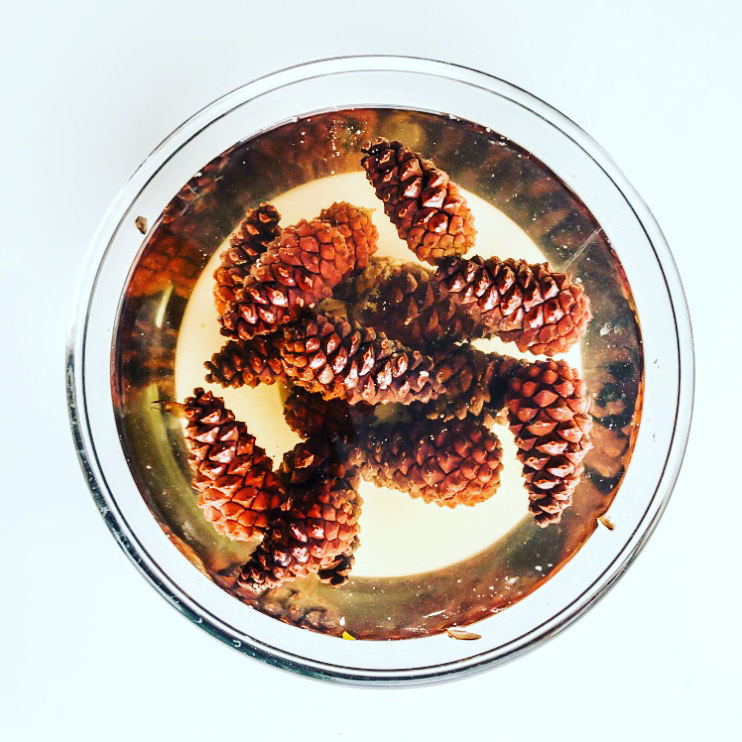
The pine cones were quite hard so I ended up pouring boiling water over them in a bowl and soaking them for approximately 2 weeks, stirring occasionally. My aim by soaking them was to soften them enough so that dye would be extracted.
I didn’t find that much dye had been extracted in the bowl after 2 weeks, so I decided to add the water and pine cones to an aluminium pot and added more water to fully cover the pine cones. I heated them on a fairly high heat for approximately an hour and a half.
Once cooled, I sieved the pine cone dye though some cheese cloth into a bowl. I then added the concentrated dye back to the dye pot and heated again for approximately an hour and a half.
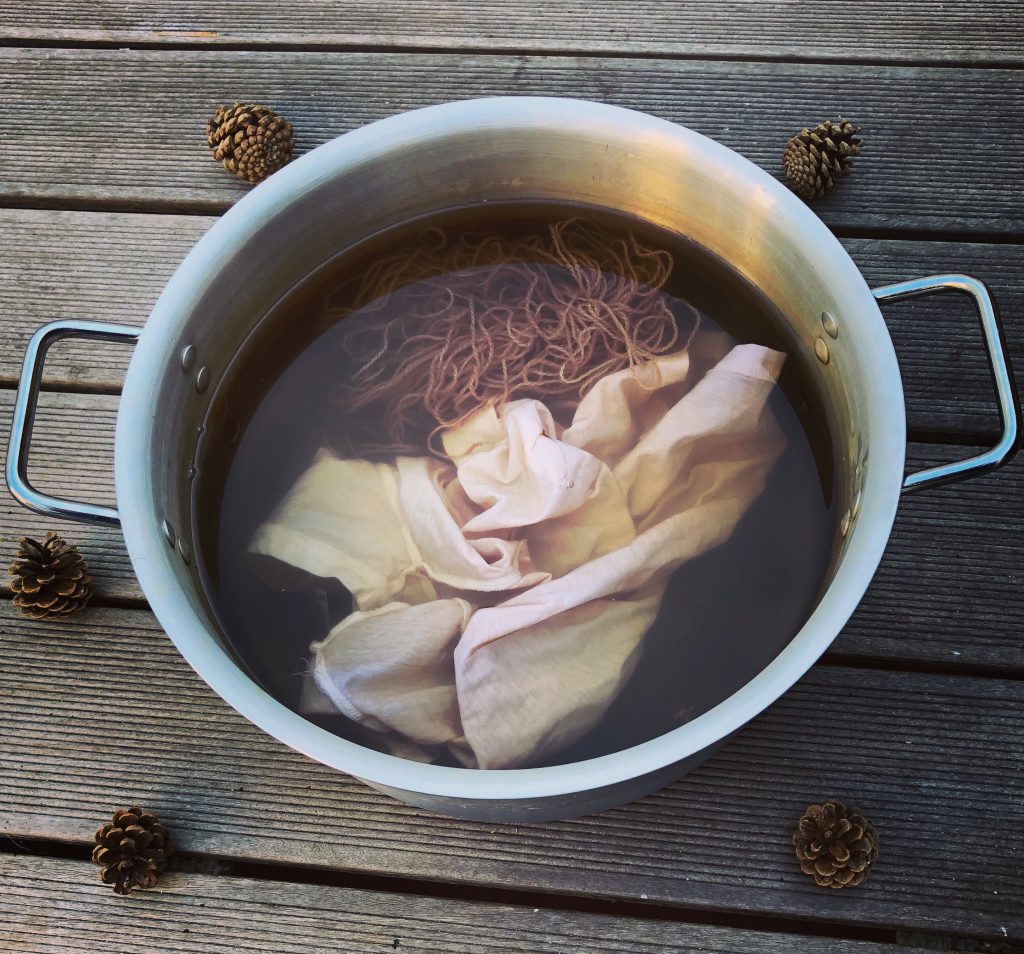
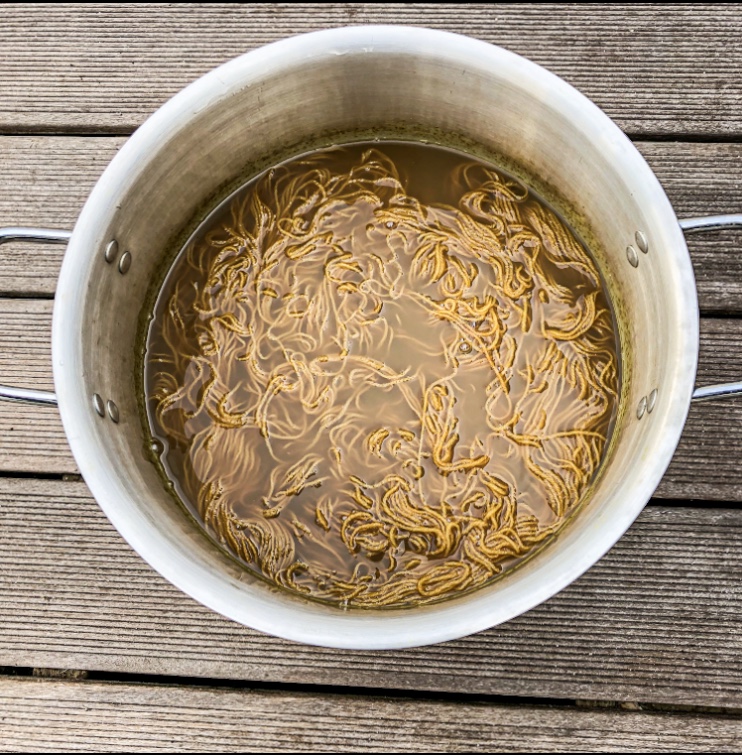
I left the dye in the pot for a couple of days before adding some wool and an organic cotton t-shirt and heated the pot up again on a gentle simmer:
When I added the wool and t-shirt, I found there was insufficient water for the t-shirt to float around in so I added some more water to hopefully get an even colour and avoid any spot staining in case it fell to the bottom of the dye pot.
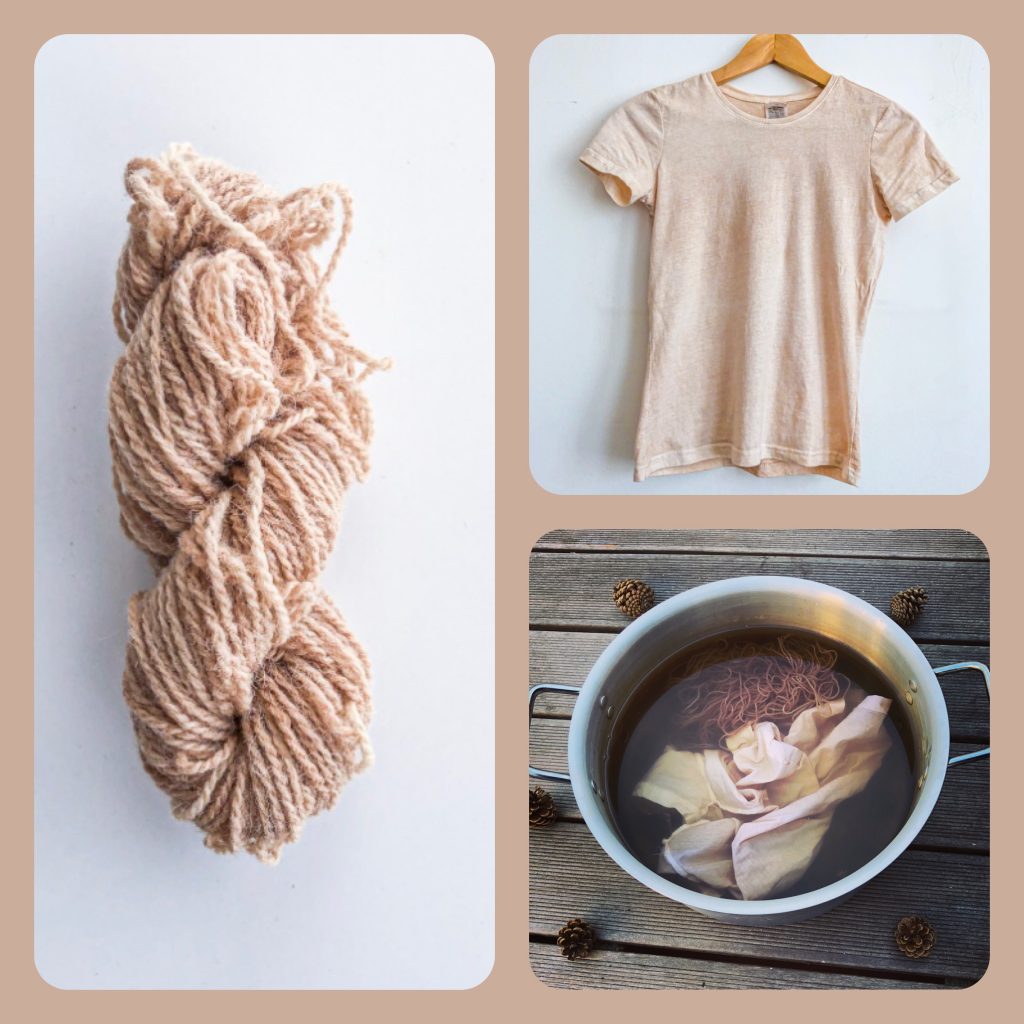
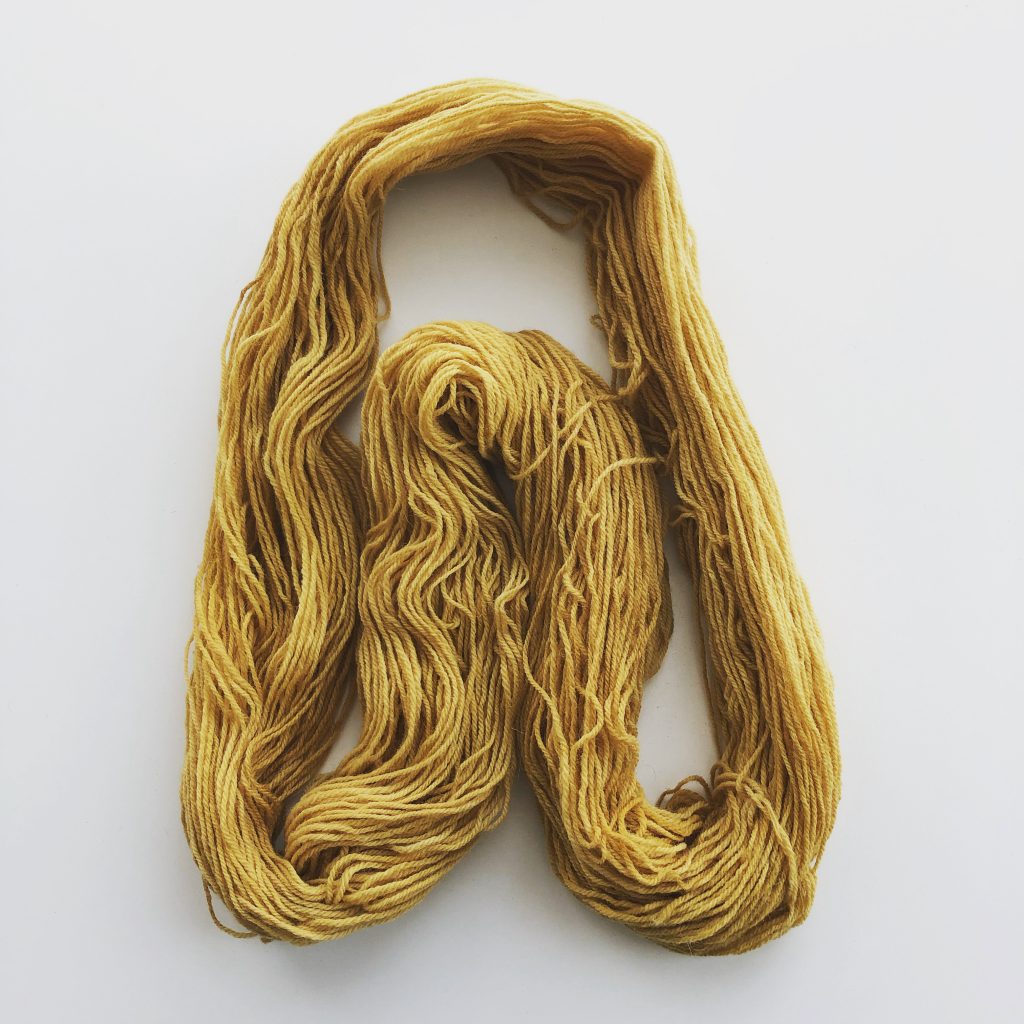
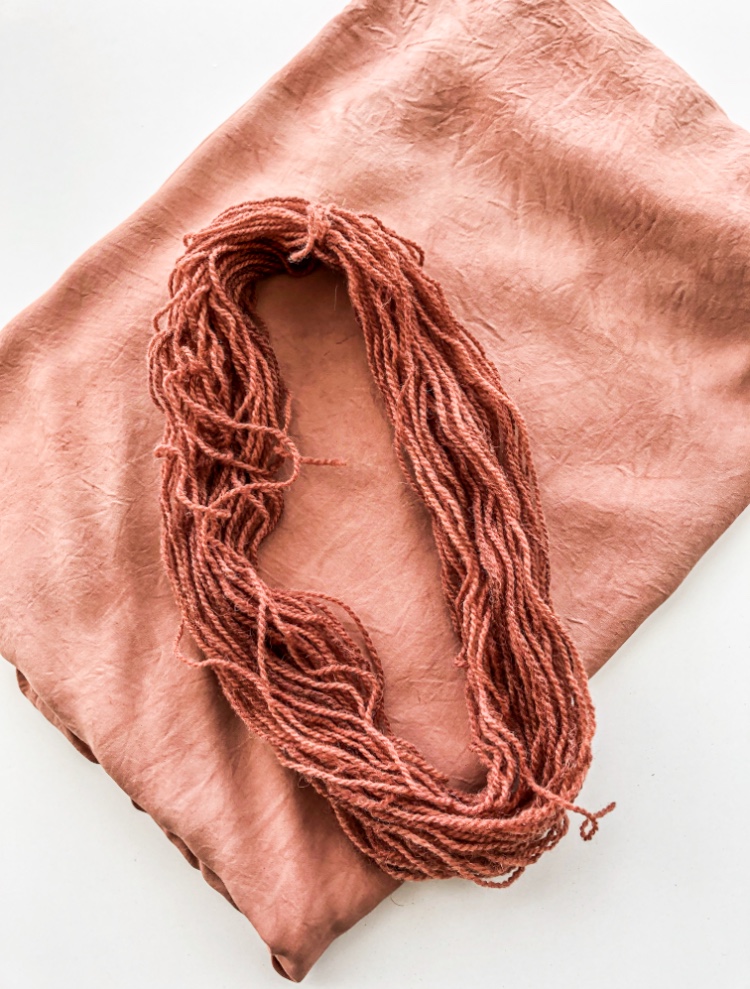
After a couple of days I hung the t-shirt and wool to dry outside in the shade and here are the results:
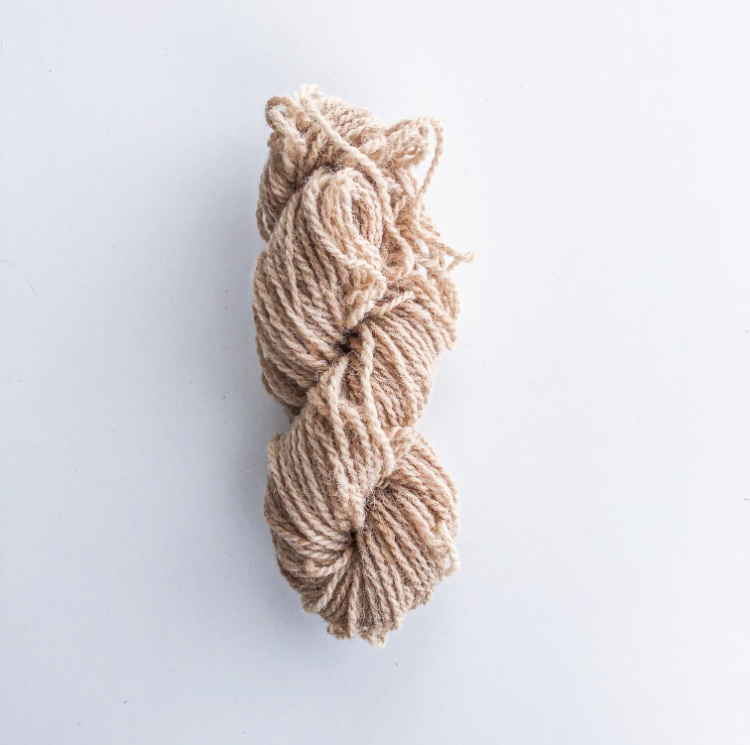
The pine cone dye had produced a type of oat colour and I really liked the shade.
Initially I was surprised at the colour since I had read that some pines and bark produce deep browns, which these pine cones clearly didn’t do.
I also wonder if it depends on how you pre-mordant your fabric/wool. I didn’t use any mordants as such. I just pre-treated my t-shirt and wool in a soya milk/water solution several weeks before dyeing them.
I will now leave the wool and t-shirt to rest in a cupboard for at least a week before rinsing to hopefully keep the dye as colour fast as possible.
From my natural dyeing research, I had learnt that pomegranate skins make a great, long lasting dye because they are rich in tannins.
Thankfully, I love eating pomegranate so I was really pleased that I could find a resourceful way to use the left over skins instead of just discarding them.
I decided the best thing to do would be to dry out the skins first before using them for a dye bath so I got as much of the left over pith off as best I could and left them near a window in the sunshine to dry out.
My first mistake was that I didn’t use them immediately after drying them and stored them in a plastic bag in the cupboard. A couple of weeks later when I went to use them for dyeing, I found them all soggy and covered in mould which I think resulted from not cleaning the skins properly and also storing them in a plastic bag rather than a paper one.
I now store all my natural dye materials such as onion skins, in paper bags since they take a while to collect. However, with the pomegranate skins, I’ve now decided that I will only use the skins when I know I’m going to dye with them straight away after drying them.
On my second attempt, I used them straight away (after drying them near a window in the sunshine). I used left over skins of 2 x pomegranates which equated to approximately 100g. I highly recommend a set of electronic scales for weighing your dye ingredients.
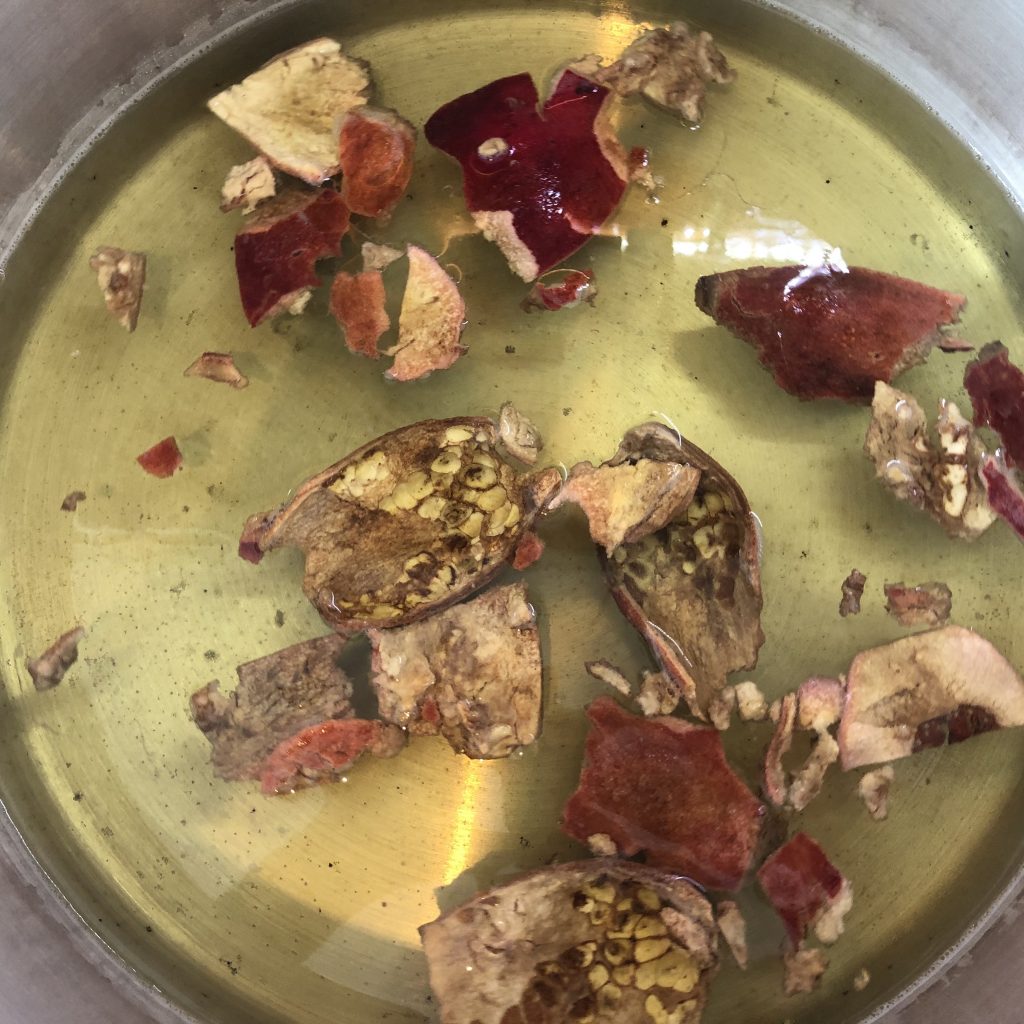
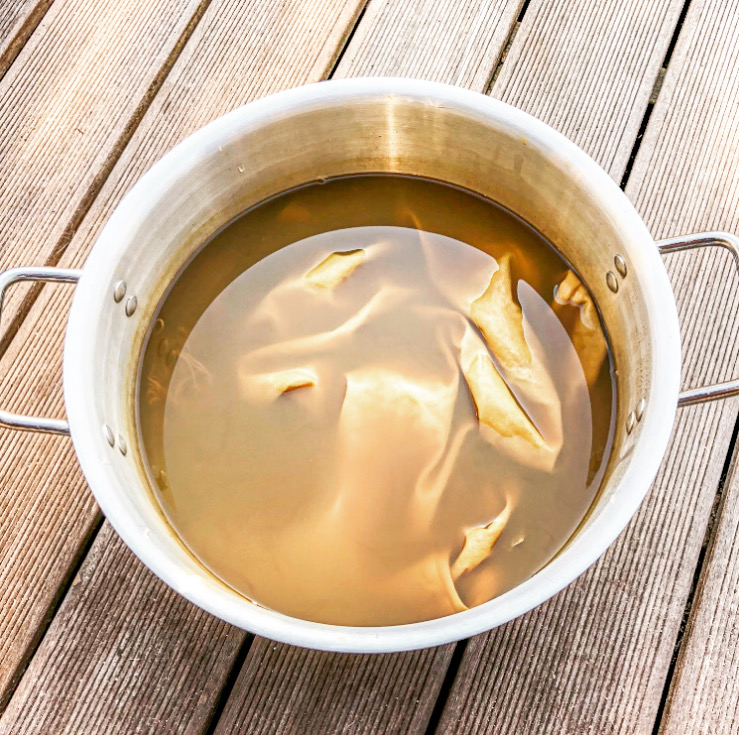
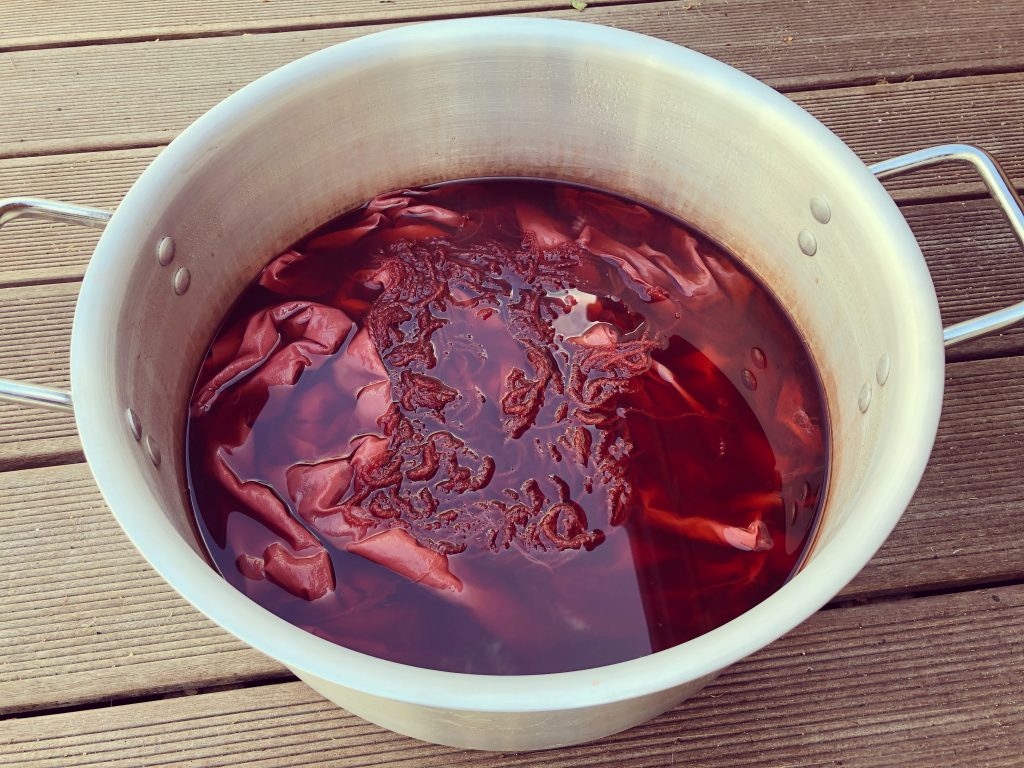
I covered the skins in an aluminium dye pot with enough water to float about and heated up the skins to a simmer for approximately an hour and a half. You’ll see from the photo below that a nice golden colour was being extracted from the skins:
Once the pot had cooled, I mashed up the skins with my hands (in rubber gloves, to prevent getting the dye all over me) and heated the pot again to try and extract some further dye. I then sieved the dye through some cheesecloth into a bowl so the skins could be discarded and heated the concentrated dye again in the pot.
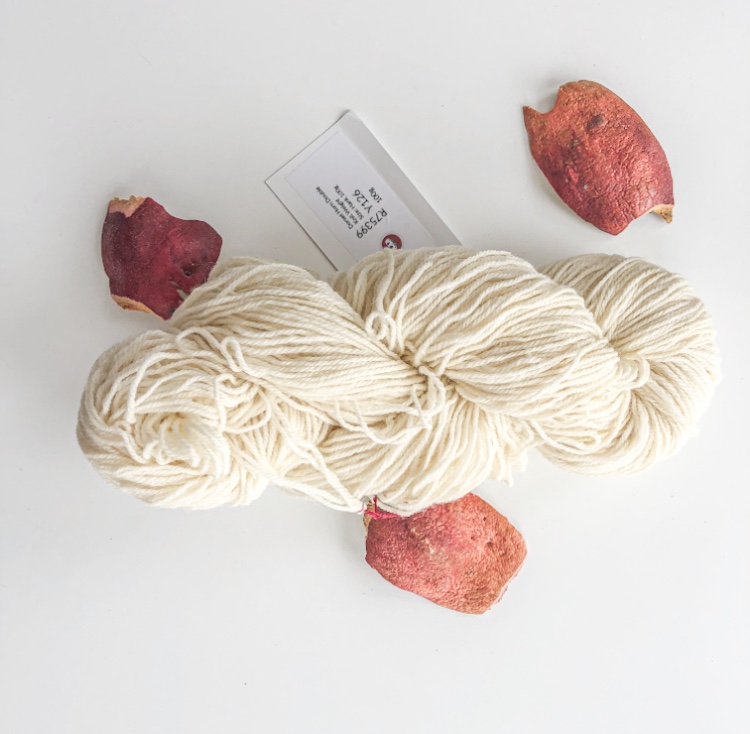
I decided the first thing I wanted to dye in the pot was a 100g skein of Dorset Horn British Wool which had been pre-treated with Soya Milk rather than a traditional mordant:
I heated the wool to a simmer in the dye pot then left it to rest once the pot had cooled:
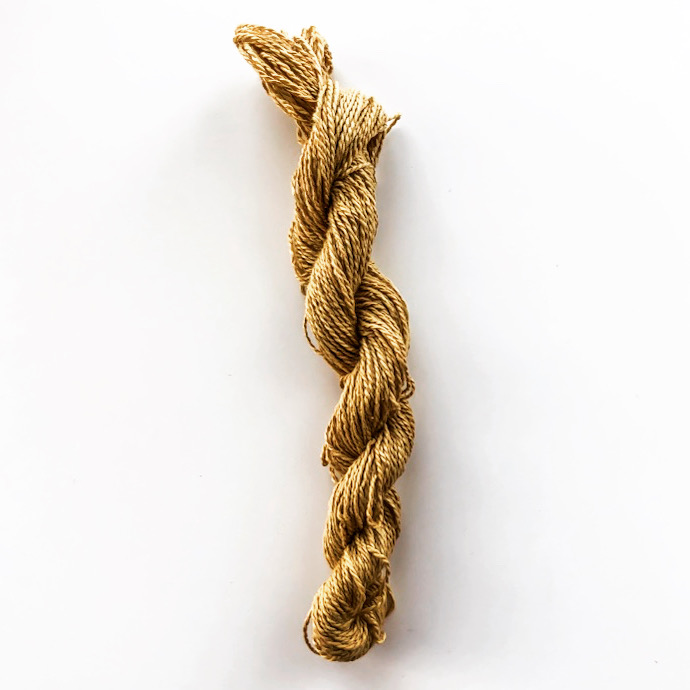
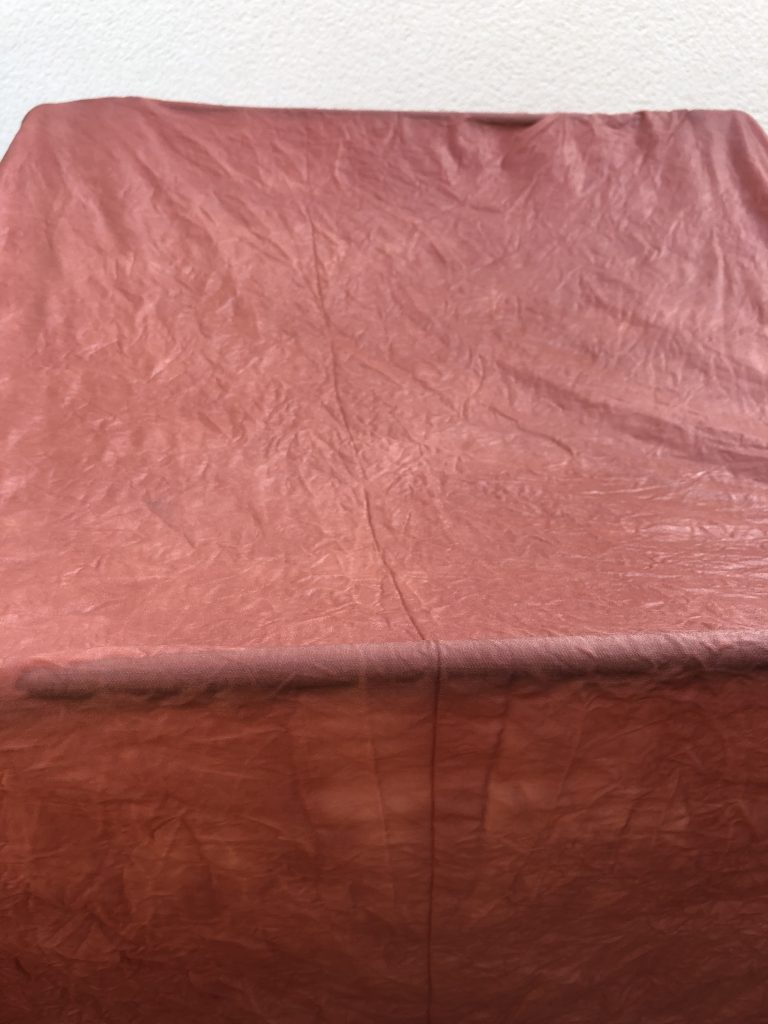
I then hung the yarn out to dry in the shade and here is the end result:
I was really happy with the golden colour the pomegranate had produced and I really look forward to knitting something with this wool once I let it rest to let the dye bond further before rinsing.
I decided that there was potentially enough dye left in my pot to enable me to dye something further.
I had never tried dyeing something further after using the dye pot for the first time in previous dyeing experiments so thought it would be great to see the results.
I decided to dye a white organic cotton t-shirt and also some mulberry silk embroidery thread which had both been pre-treated with soya milk rather than a traditional mordant.
I again heated the dye pot to a simmer and left them to rest in the pot once cooled to give further opportunity for the dye to bond with the t-shirt and thread:
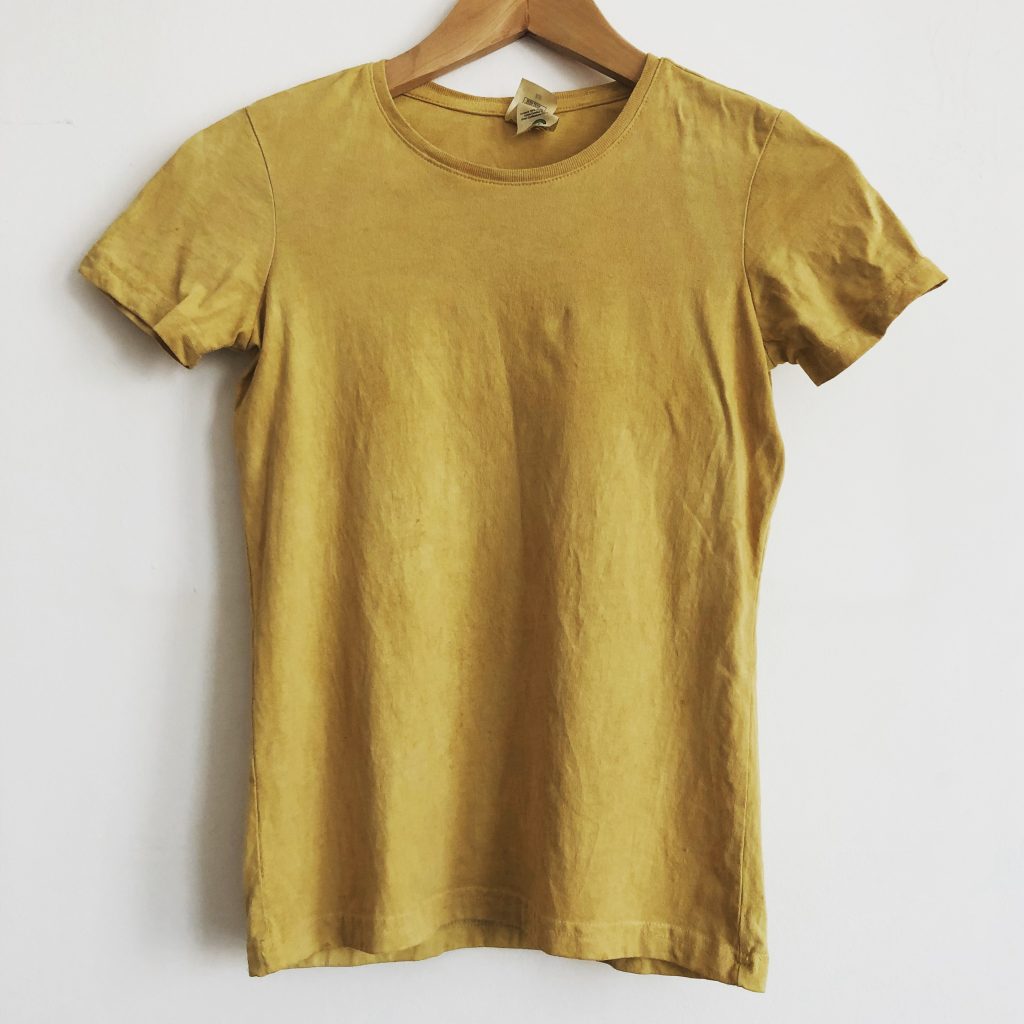
The colour of the dye pot didn’t seem much different to when I had the wool in there and I was surprised as I thought it would be lighter after using for the second time. Here are the results of the t-shirt and thread after I dried them:
The colours were very similar to the wool I had dyed so I was really happy with the results!
I will definitely be using pomegranate skins again in my future dyes since I think it makes a great golden colour.
My only slight disappointment was with the mulberry silk embroidery thread which had lost it’s sheen when I had pre-treated it with soya milk. The initial sheen to the thread pre-treating unfortunately hasn’t come back after the dye process so I think I will try dyeing a further thread at some point with a tannin rich dye without the soya milk treatment first. I will report the results of this method in a future blog.
From my initial natural dyeing research, I had read that dyeing with avocado skins and stones are one of the easiest things to try to dye with as a beginner, plus I really liked the peachy/pink shades that they seem to produce.
I love avocado and often eat them for lunch so thought this would be a great starting point for me.
I decided that trying to clean the avocado skins would be too messy and I was concerned about them going mouldy if I didn’t use them in time so for now, I thought I would just experiment with the stones.
At this point, I would like to highly recommend two books on natural dyeing which really helped me to try out this process.
They are available digitally and you can currently buy a paper copy of the Botanical Colour at your Fingertips book directly on Rebecca Desnos’s website.
Both books describe slightly different dyeing processes and I ended up doing a bit of a combination of the two for my own experiments.
All the fabric/yarn I used was pre-treated in soya milk then left for a least a week before I attempted dyeing them.
In the first dye batch I did, I used around 6 avocado stones. I used an aluminium pot as that is meant to help the mordanting process if using soya milk.
When extracting the dye after heating it in the pot, I made my first beginners mistake of not using a large enough bowl to sieve the liquid into and because I was sieving it through cheesecloth, I didn’t notice and a lot of the dye went down the sink!
I decided not to give up and work with the dye I had managed to get into the bowl.
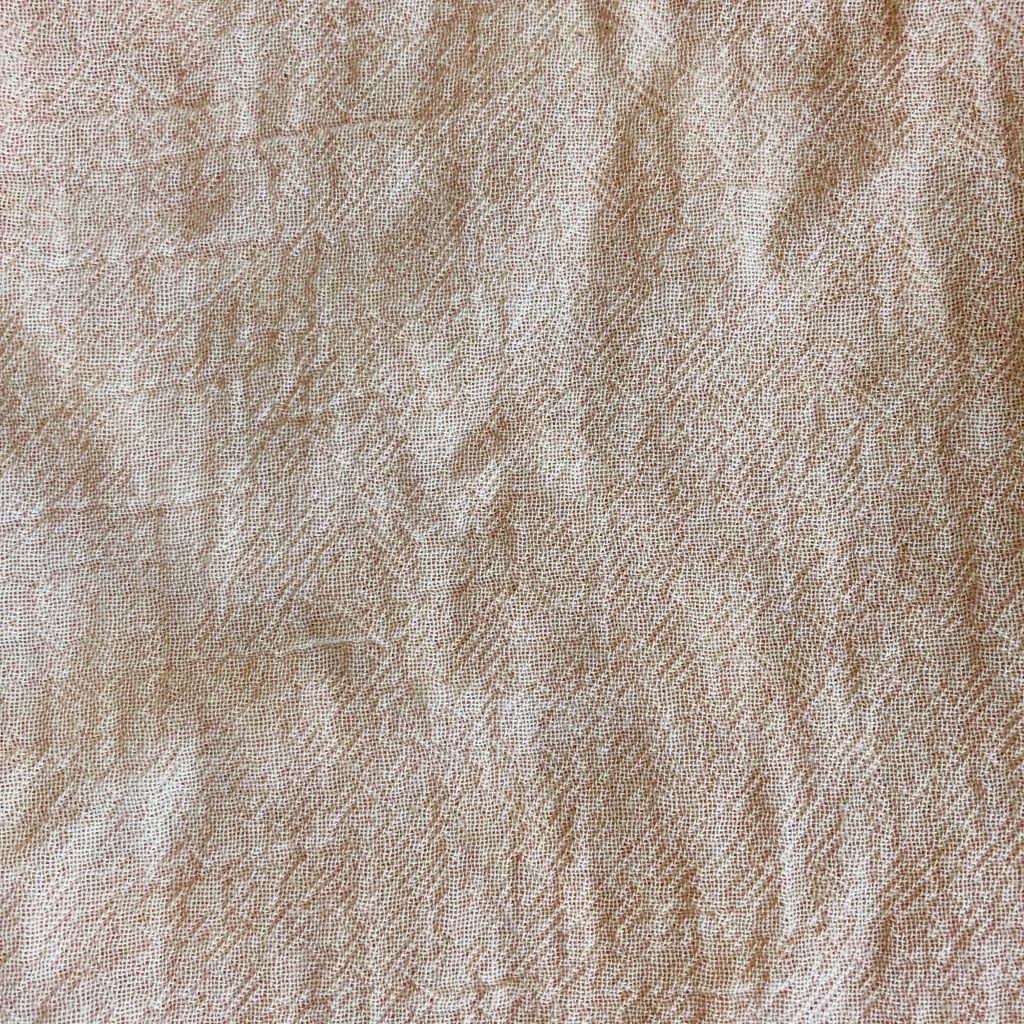
I dyed some Fine Loomstate Organic Cotton Muslin that I had purchased from Greenfibres and the end result was this very light peach colour:
First of all, I was happy that a colour had managed to come out on it at all considering my mistake. I was also really happy that it had dyed evenly all over so I think I had used the right size pot for a metre of fabric. The pot size I used was 36cm (14″) and had a capacity of 16L.
I also think doing the soya milk process first to the fabric helped with the even dyeing of the fabric.
I was very excited by the whole dyeing process and was keen to try out dyeing with avocado stones again.
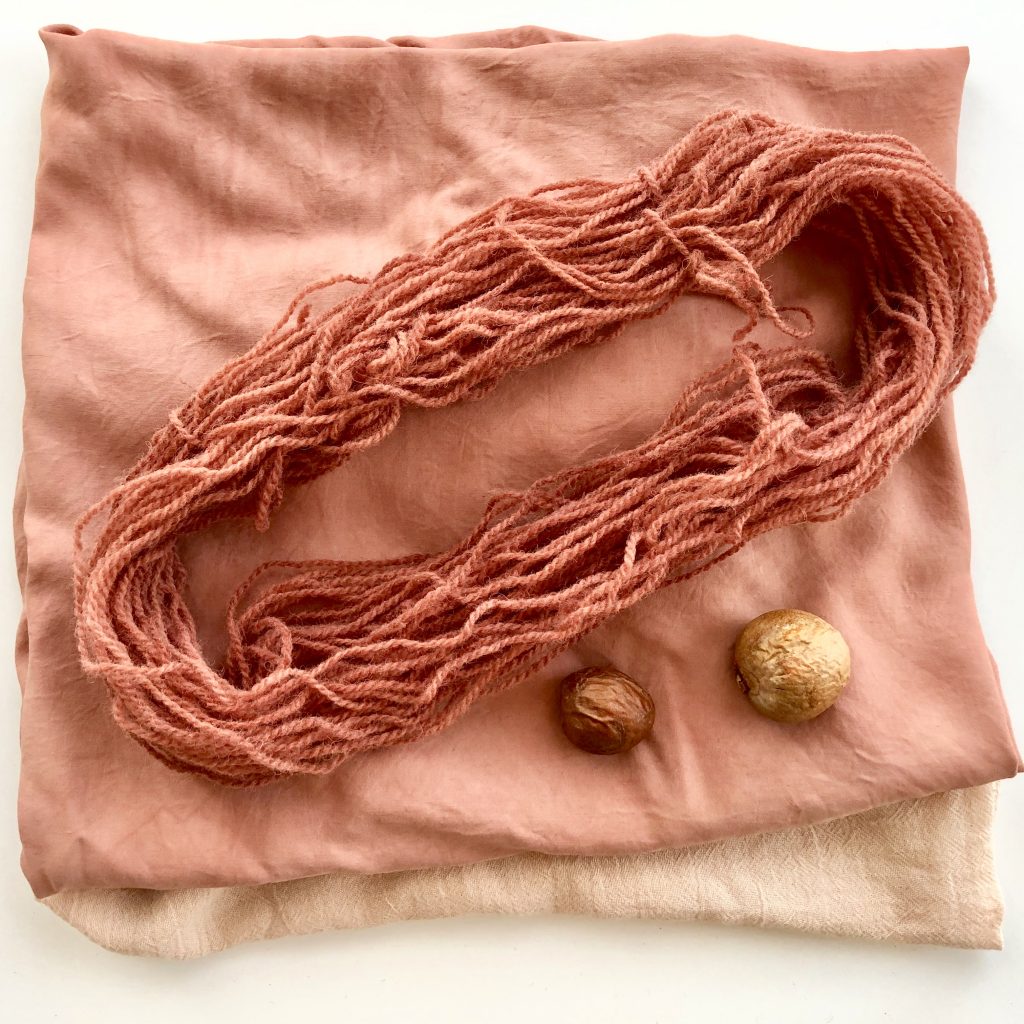
Next I wanted to dye with both fabric and some yarn. I had managed to save 8 avocado stones for my next dye pot. I also had a larger bowl prepared for extracting the dye so didn’t lose any of it this time.
When I had extracted the dye, I noticed that there was still some colour left to extract from the mushed stones which were left, so I re-heated all the dye with the mushed stones and repeated the whole process again.
Once I had done that, I was happy with the colour of the dye and ready to add my fabric and yarn:
After initially heating the fabric and yarn in the dye for approximately an hour and a half, I then left them in the pot for around three days.
Here is the fabric after I removed it from the dye pot and hung it outside to dry in the shade:
Here is what the fabric and yarn looked like once dry:
The yarn is 4ply Organic Lleyn Wool and the fabric is Bamboo Silk.
I was really pleased with the darker colour I managed to get on this occasion.
I’m now going to leave the yarn/fabric for a minimum of one week (to allow the dye to bond to the fabric and yarn further) before I make anything with them.
As you have probably guessed from reading this blog, you do need a lot of patience if you want to dye yarn and fabric naturally since the dyeing process can take several weeks in total from prepping the fabric to dye and the time required to dye the materials then let them rest before creating anything with them.
Since I’m a hand knitter, I feel I do have a great deal of patience when it comes to the creative process.
What I love about natural dyeing (apart from the fact it’s 100% natural without any nasty chemicals and experimenting and seeing the final colour results) is the fact I can do bits of it around other things I’m doing on a daily basis.
I can spend some time in the morning, prepping the fabric in soya milk and leaving it for a few days. I can simmer a dye pot for an hour in the evening after dinner and let it cool overnight before starting the next process.
Once you start, you’ll find there are always different parts of the process that can be done throughout the day/week that don’t actually take up a lot time.
I’m looking forward to blogging about what I will be dyeing with next.
If you would like to be updated with what I’m doing with natural dyes, please subscribe to my blog and you’ll receive notifications when I’ve uploaded a new blog.